Do you want to customize your Jamboard background? Or do you want to make your own background for Jamboard? This blog post has you covered. I’ll take you through the steps to create a Jamboard background using one of my favorite free tools. This teacher-friendly tool helps you find the perfect background for your Jamboard.
Note from 11/2/23 — Worried about Jamboard shutting down in 2024? Here’s an alternative for you to explore.
Regular readers of the blog know that I’m a big fan of Jamboard. Torie Marquez joined me on my Easy EdTech Podcast (Episode 99) to chat about using Jamboard during professional learning. And Iate last year, I shared a post with a few favorite Jamboard activities that I talked about on episode 95 of the Easy EdTech Podcast, too. It’s also been a spotlight tool a few times in the masterclasses in my Easy EdTech Club.
I’ve included the recording to episode 95 below so you can press play right from this blog post if you want to take a listen. You can also find that episode on Apple Podcasts, Google Podcasts, or Spotify by clicking on these links.
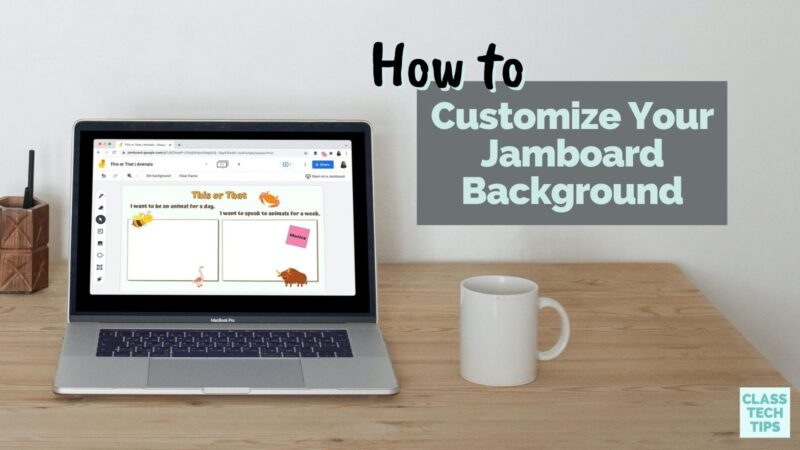
How to Customize Your Jamboard Background
There are a few things to consider before customizing your Jamboard background. First, you want to create an image that is a landscape with a 16:9 ratio. This sizing is similar to a widescreen presentation slide. Essentially, you create an image of this size and upload the background to your Jamboard. Although there are a few places to go to make a background image for Jamboard, the screenshots below take you through Canva.
You can set up a Canva account for free using this special Canva for Education link. If you want to set up a personal account in Canva, you can set up a free account using this link and follow the same steps below.
Before creating your background, you’ll want to know your “why” and reason for bringing students into a collaborative space like Jamboard. In the example below, I feature a “This or That” activity. In this activity, students would be asked to add their name to a sticky note and place it in one of the two categories. Here’s a list of a few more collaborative activities featuring Jamboard.
Creating a Background Image in Canva
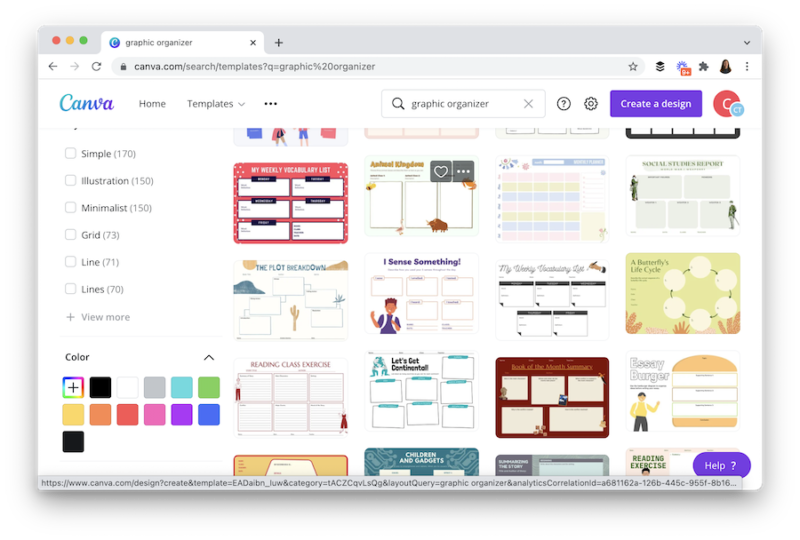
First, head over to Canva and sign in with your account. Although there are a few ways to get started, I like using the search bar at the top of the screen. This option lets you find a template to use instead of starting from scratch. For example, you might use a very general search term like “education” to find school-related templates. I have found that the search term “graphic organizer” is a great place to start.
When you find a graphic organizer you like, you can click on it to open it up in a new window.
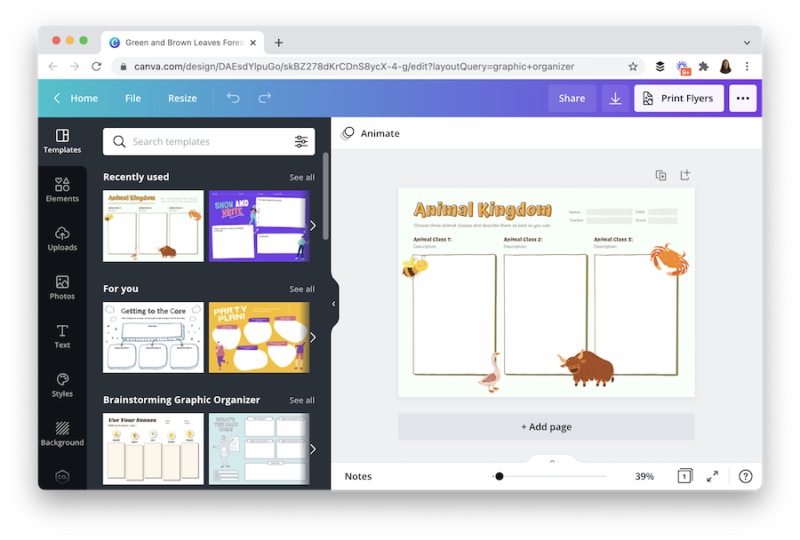
Now, this example is a “This or That” activity where students will say whether they would want to be an animal for a day or whether they would want to speak to animals for a week. It’s not an animal kingdom activity, but this animal-themed graphic organizer is an excellent place to start.
I will delete the extra items on the page (the name/date area at the top) and get rid of one of the text boxes since I’m only giving students two choices (this or that).
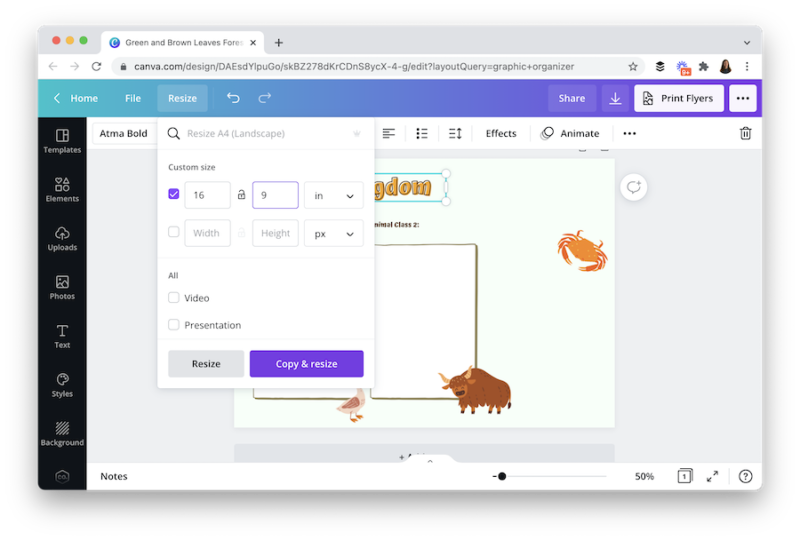
Then I will change the size of the document to make sure it is the correct size for Jamboard. At the top of the screen, I can change the size to a 16:9 ratio. This will resize the page, so it is 16:9 like a widescreen presentation slide.
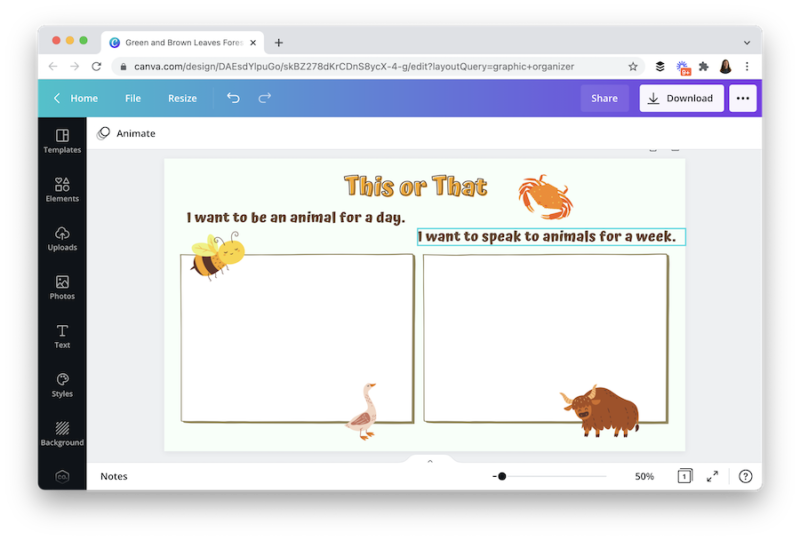
Next, I will add a new title, my two “this or that” categories, and enlarge the boxes to fill the entire screen. You can add more graphics to the screen if you want to by choosing elements from the sidebar on the left-hand side of the screen. I chose a graphic organizer template related to my theme so I wouldn’t have to do anything extra.
Adding Your Background in Jamboard
When you finish creating your background image, tap on the Download button at the top right corner of the screen. You can download your background image as a PNG or JPG file.
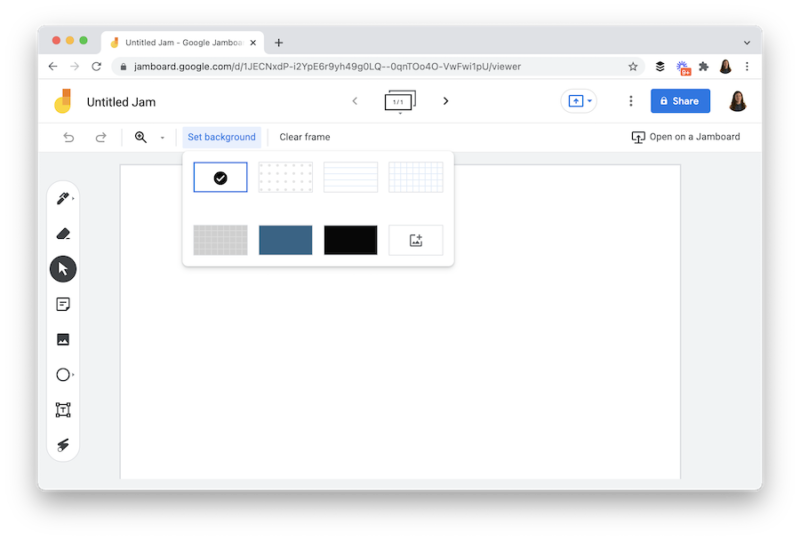
Once your file downloads, head over to Jamboard. When you open up a new Jam, you’ll click on the “Set Background” button at the top of the screen. Next, the photo button gives you the option to upload your picture.
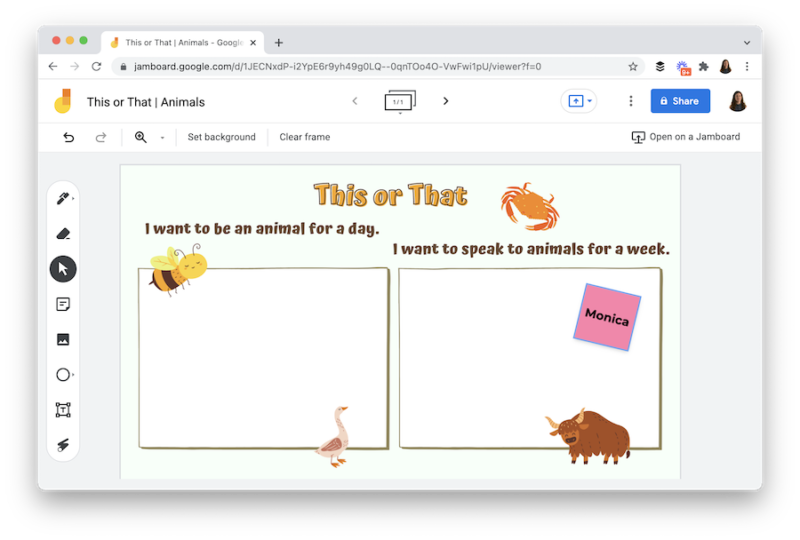
This step is when you’ll upload the background image you created in Canva. The image will stick to the background of the Jam, and students can then add their sticky notes right on top of the background image without it moving around.
Note: If you’d like to use the Jamboard and template I created, click here to make a copy so you can try out with your students.
Ready to get started with customizing your Jamboard backgrounds? Head over to Canva to set up a free account to make your Jamboard background.