Google Forms is one of my favorite tools because it is super customizable and can help you stay organized. In this blog post, I’ll share one of my favorite ways to use Google Forms and take you through the steps to create a digital checklist. This is a strategy I often share in workshops and webinars when talking about ways to keep track of information.
As a classroom teacher in pre-device days, I was a big clipboard person. Now this wasn’t in the walk around a silent classroom tapping on the edge of my clipboard sort of way. Instead, I used clipboards with checklists on each one to keep track of formative assessment data. As I sat in with students working in small groups, I would have my clipboard nearby to jot down a note or record an observation.
Way before Google Classroom came into the equation, I started playing around with Google Forms. I loved the idea of using forms to make my own system for keeping track of information. Creating my own Google Form gave me the power to create a digital checklist that was completely customized to my organizational needs.
Let’s dive into the steps for creating a digital checklist with Google Forms.
Digital Checklist with Google Forms
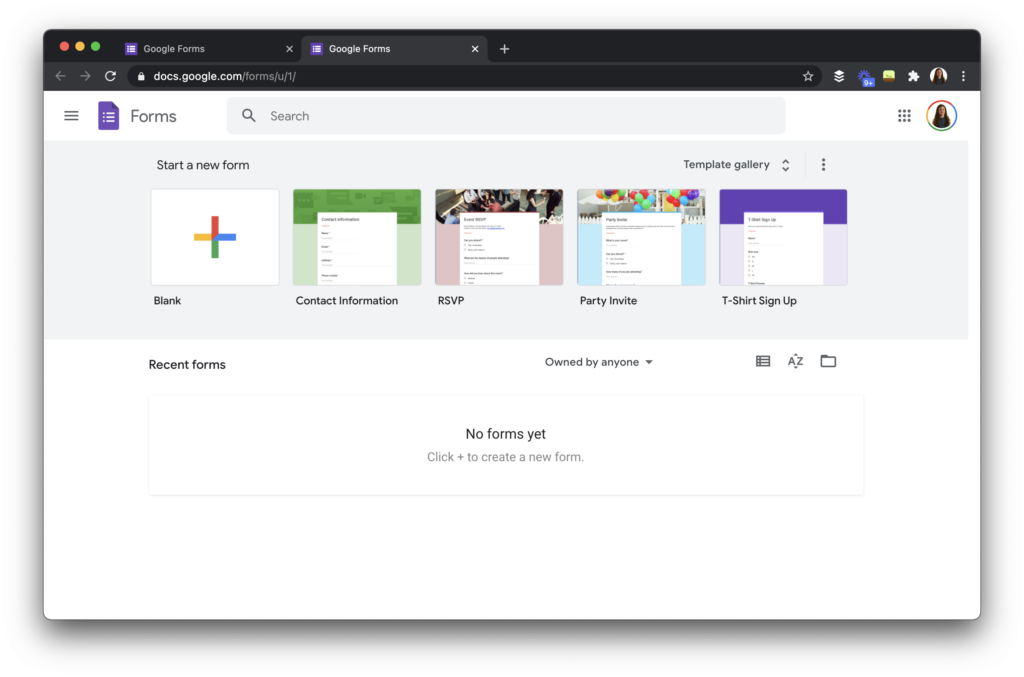
What is Google Forms? Google Forms is a Google Tool that lets you create a survey-style data entry form. Although I’ll take you through steps using this tool in the blog post, you can use Microsoft Forms essentially the same way. To get started with Google Forms, head over to this landing page and sign into your Google account. You can also find Google Forms through Google Drive.
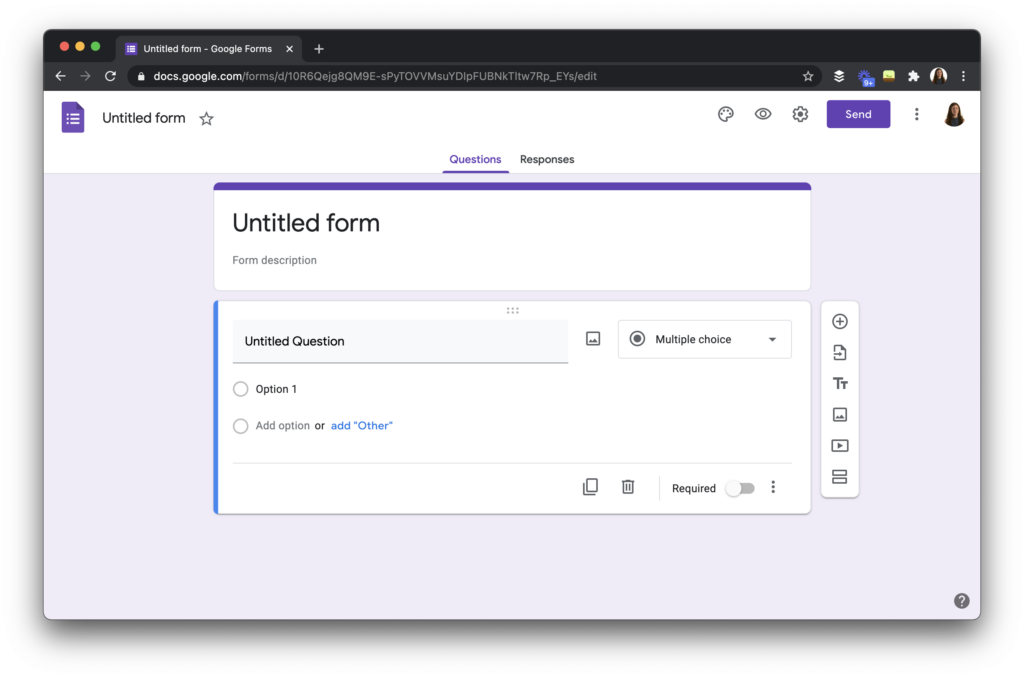
You can start with a template or you can start from scratch like I’ve done in the example below. There are lots of ways to use Google Forms and our “how to” with digital checklists is just one way. As you can see in this image, there is the option to customize the title and description, and add a variety of content (side menu) including questions, text, images, and more.
How Do You Make a Digital Checklist?
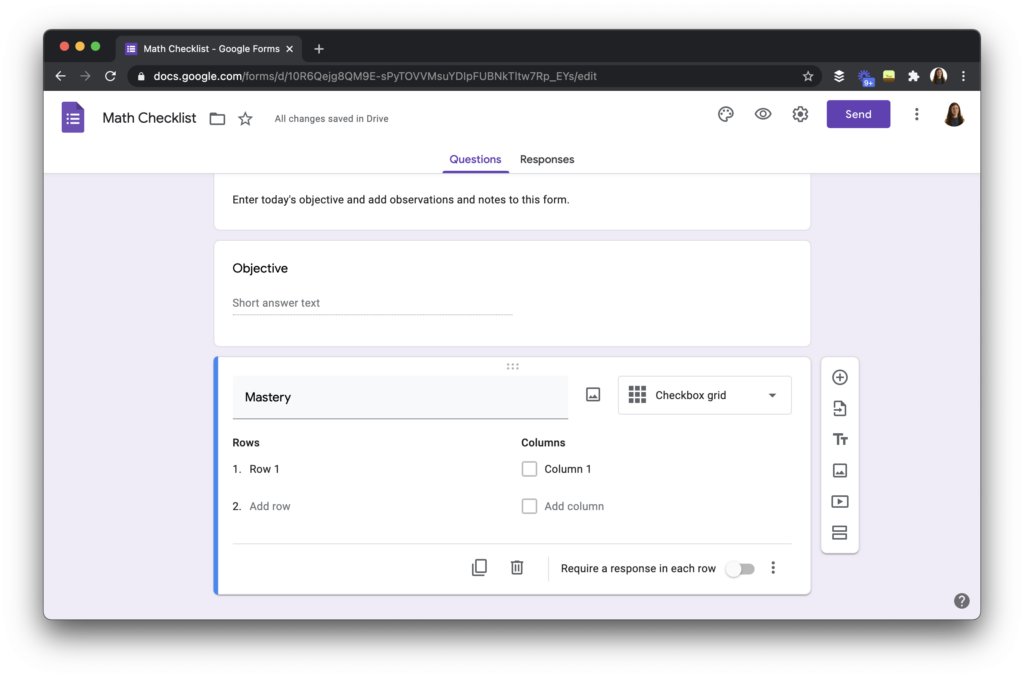
To create my digital checklist example, I first think of what I want to accomplish. I want this to be a space I can use everyday (or a few times a week) to monitor student mastery of an objective. To accomplish this goal, I’ve first added a reminder for myself at the top of the form. Then I added a spot where I can add the objective guiding my observation that day. For the objective, I just need space to type a sentence or phrase so the “Short answer” question option is perfect.

The next part is where the checklist part comes into play. In this part of the form I want to be able to click next to the name of the student and indicate how well they’ve mastered the objective — or whatever it is I’m keeping track of that day. To do this, I use the “checkbox grid” option.
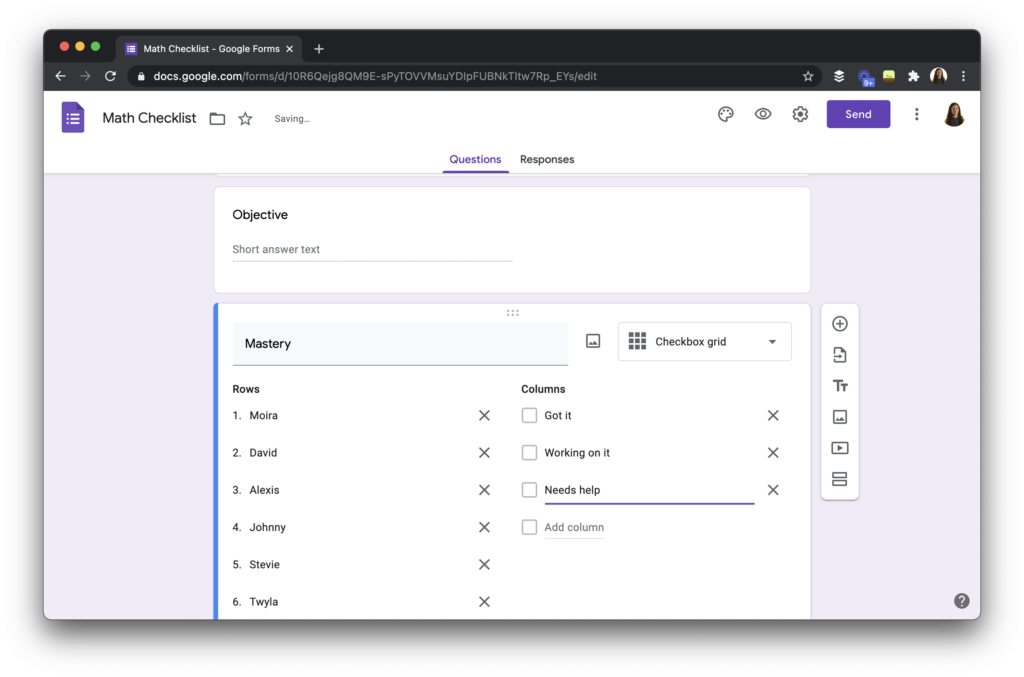
Then, I add the names of students in the rows area and the categories where I’m looking to check off — in this case I’ve added: Got it, Working on it, Needs help. You will only need to type in your student’s names this one time when you make the form. If students join or leave your class, you can go back into edit mode and make any changes to the from.
Collecting and Review Checklist Results
When you are ready to use your form you can tap Send or Preview to get the link. Then every time you want to use this form you can add the objective at the top and check off the boxes next to student names.

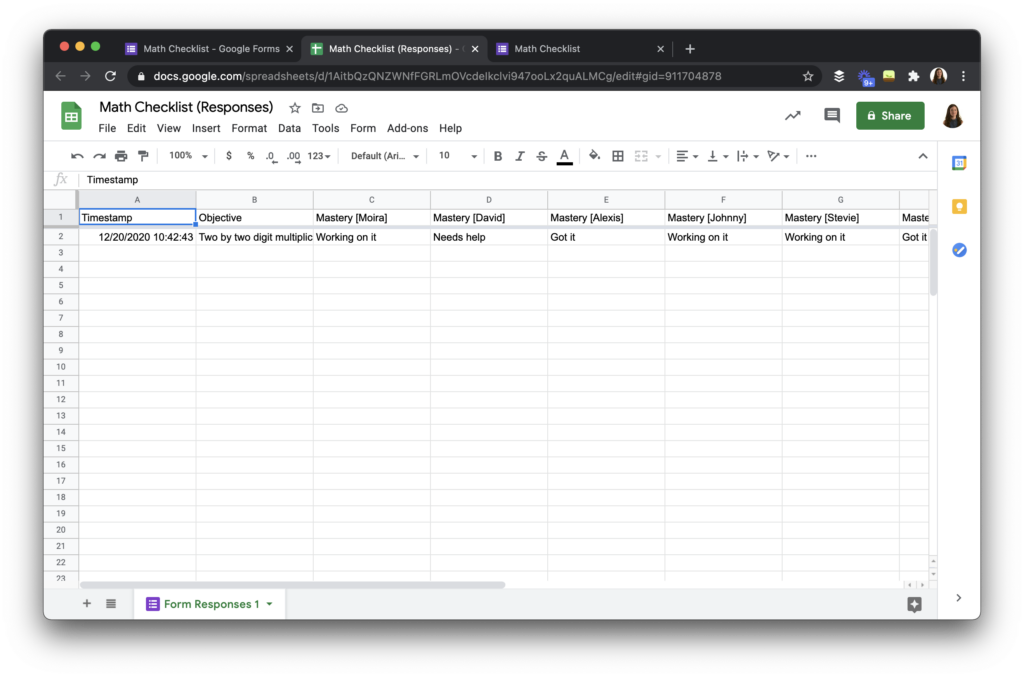
To see all of the results, you can either use the Responses view like you see below or create a spreadsheet by tapping on the green button on this screen to make a spreadsheet.

The spreadsheet version, like you see below, is my preferred view. It automatically timestamps your entry and organizes all of the information in rows and columns. I also like this option because you can decide if you want to share this data with another person, like a co-teacher, coach, or administrator. You can share the data from your checklist by tapping on the Share button at the top right corner of the screen.
Ready to create a digital checklist? Google Forms makes it easy to customize a checklist for your class. You are in the driver’s seat and can decide the topic, categories, and organization of your survey-style data entry form. Have you made a form like this before? Share in the comments section or on social media.
Note: Here’s a post on linking QR codes to Google Forms — it’s from 2014 but still gets a lot of traffic — and is another favorite Google Forms strategy