This year one of my most popular posts was all about the curation of teacher resources. Setting up a system to keep all of your links and favorites organized is essential. Whether you’re sharing resources with colleagues, students or families, having one page to send everyone too makes this process simple.
When it comes to sharing student work, there are lots of ways to showcase the great things happening in your classroom. In this blog post, you’ll find three ways to share student work with Spark Page. This dynamic, open-ended creation tool can be used for a variety of purposes. Although I often share Spark Page as a way for students to easily create websites, this post will focus on sharing lots of examples of student work — with the teacher as the creator of the Page.
If you’d like to learn more about student projects using Spark Page, check out my new book written with Ben Forta 40 Ways to Inject Creativity in the Classroom with Adobe Spark.
Share Student Work
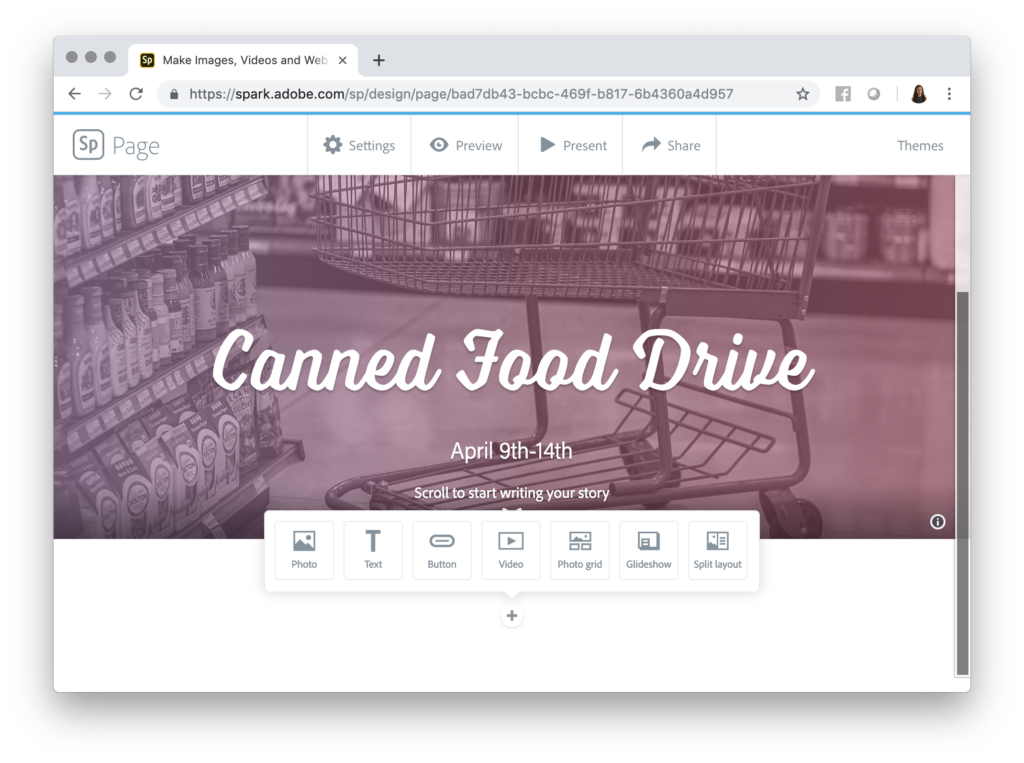
If you haven’t used this tool before, Spark Page is a website creator for users of all ages. Some educators use this tool to create a landing page for a special event, like a book sale or clothing drive. It’s essentially a single webpage that you use to share information. Every time you see the plus sign (as shown in the picture below), you can add content to your page. Let’s examine one way you can share student work with Spark Page.
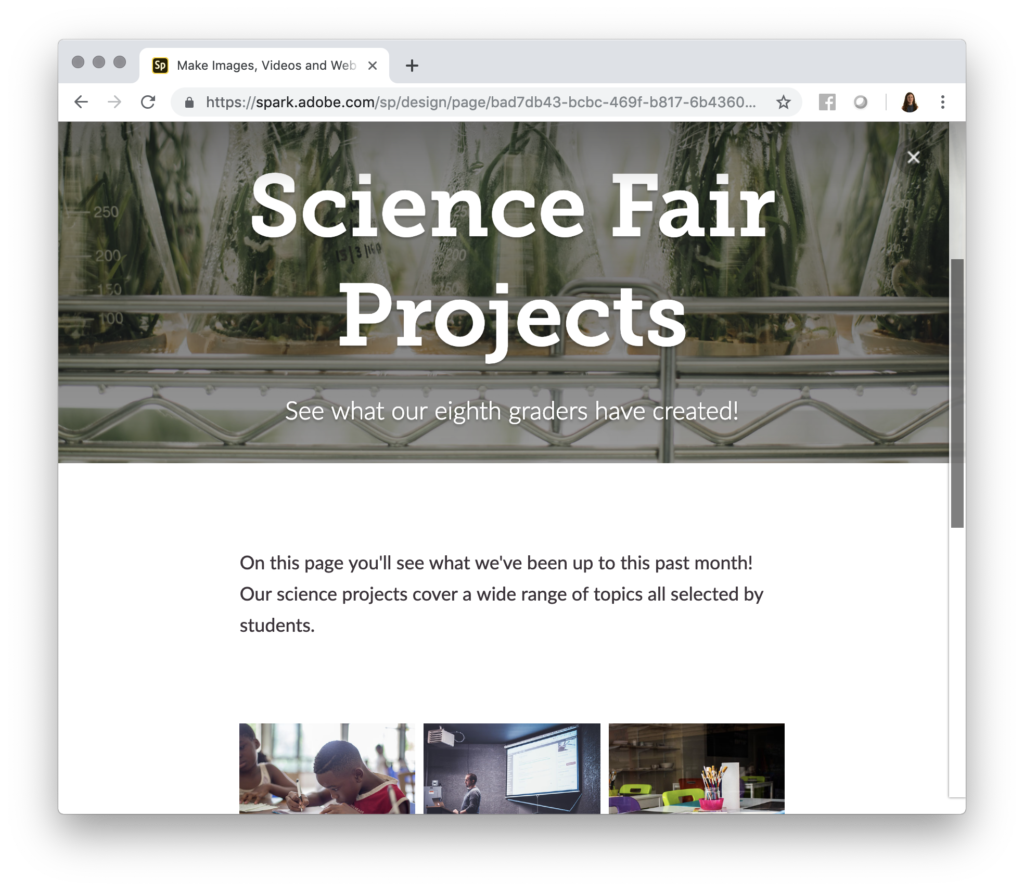
Pictures of Student Work
Regular followers of the blog know how much I value the power of using digital tools to help students share the story of their learning. Although your students might make plenty of digital creations, you might also have students create something more tangible. If your kids have made dioramas, posters, or another tangible product to show off their learning, a Spark Page is a perfect place to show off pictures of student work.
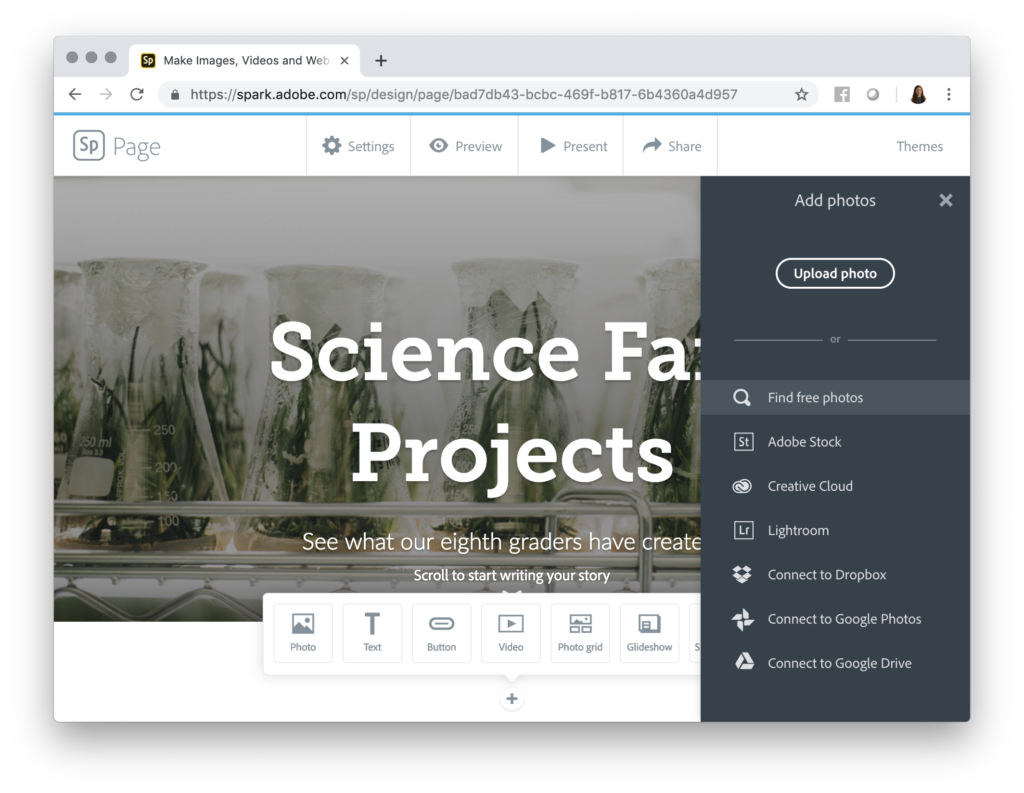
You might snap pictures and save them to your computer, smartphone, or tablet. Alternatively, you might have photos of student work in your Google Drive or Dropbox. To help keep the pictures of student work organized, you might want to place an index card with each students name next to their work. This way you can easily tell which picture features which student’s work.
Spark Page will let you add pictures individually, as a grid, or even a glideshow. The glideshow option is definitely one of my favorites. It lets you add media on top of your picture like a moving caption.
Creative Captions
Whether you add these pictures as glideshow, grid, or individual image, you can now add more information to your Page. Once you’ve filled your Page with images of student work, you might decide to add a paragraph explaining the project students worked on, or captions with more information.
Although you might write an introductory paragraph or compose creative captions yourself, students can also join in on this process. For example, you might ask your kindergarten class to decide what information should go on the Page. Or you might ask your high school students to snap pictures of their work themselves and include a sentence for a caption in the email they send to you with the image file.
What I love about Spark Page is that there isn’t one “right way” to use this tool. It’s a blank canvas for you (and your students) so you can share pictures of student work in any way you’d like.
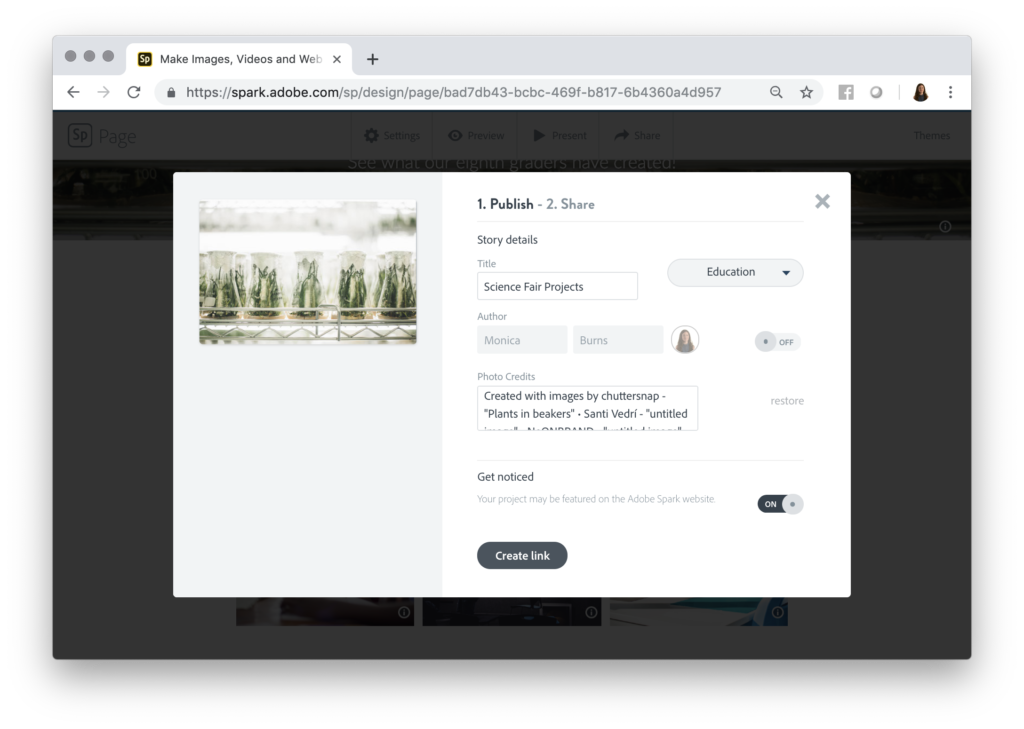
Publishing a Spark Page
Whether you’ve showcased pictures of student work, summaries of their accomplishments or links to online spaces where they work is ready to view, sharing your Spark Page requires the same steps. Simply use the Share button at the top of the screen, add any extra details, and then you’ll have a link to share. Note: Because you are creating a website with a live and public link, you’ll want to make sure you have permission to share student work online.
Once you have the link to your Spark Page, decide on how you’d like to share your students’ creations. Perhaps you post the link to a school social media page, you send it out in an email to families, or you connect it to a QR code to display outside the main office of your school. The possibilities are endless!
I can’t wait to see what types of student work you showcase with Spark Page this school year. So many educators send me links to their creations, tag me on social media (@classtechtips), or show me what they’ve made when we meet at a special event. You can also leave a comment on this blog post with links you’d like to share too!
Head over to Adobe Spark’s website to get started, or download Spark Page in the Apple App Store.