Although I can’t say I’m new to webinars, with a quick shift to virtual professional learning last year, I knew I had to update my regular routine. In this blog post, I’ll share a caption hack that I truly can’t live without. It’s something I’ve used on many of my virtual events this past year — and I get lots of questions about how to do it.
For several years, I’ve hosted live webinars as part of the way I connect with educators. I have always loved virtual events — where we can join live, have a recording, and connect with educators in different parts of the world. When I started creating video content for my membership site the Easy EdTech Club in 2019, I realized I wasn’t doing quite enough to make sure my content was accessible.
Last year, the number of webinars I hosted each month started to rise quickly. And just like the video content in my membership site, I knew I had to do more to make sure that my webinars and live content was more accessible for all participants. This Google Slides caption hack is one I am asked about all the time, and I want to take you through the steps.
A Caption Hack I Use & Love
In this blog post, you’ll find the steps alongside screenshots, and I’ve included a tutorial video so you can see the steps in action, too. This “caption hack” isn’t perfect but it’s a step in the right direction, and I’m always on the lookout for feedback and advice in this area. So if you have a tip, workaround, or favorite solution, please share in the comments below or reach out on social media.
Note: As I mentioned at the top of this post, in my membership site, I add captions to all of my videos, and include a downloadable transcript. I use Rev.com to generate SRT files which I upload for each Easy EdTech Club video. I often use Rev.com to create transcripts for my podcast episodes, too. However, this Google Slides hack is perfect for live captioning in any video conferencing environment!
How to Set Up Live Captioning
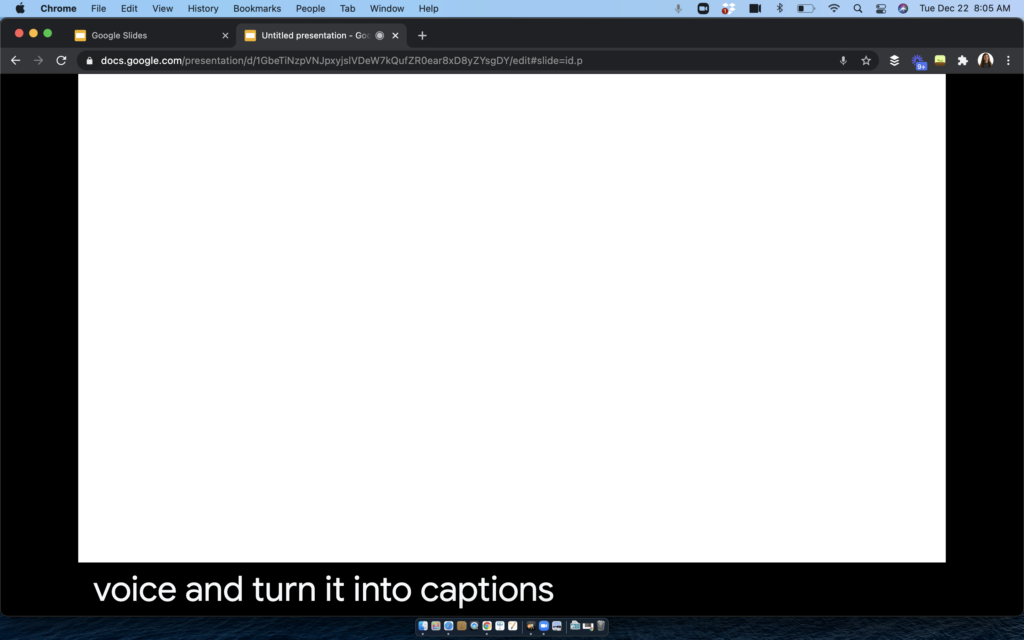
For this “caption hack” I set up a Google Slides presentation in the background of my screen and layer my slide deck and web browser on top. This gives me the flexibility to use a Keynote slide deck and demo different EdTech strategies and tools when I’m leading a webinar. You can watch the full demo in the YouTube video below, or follow along with the screenshots.
Steps for Setting up Live Captioning
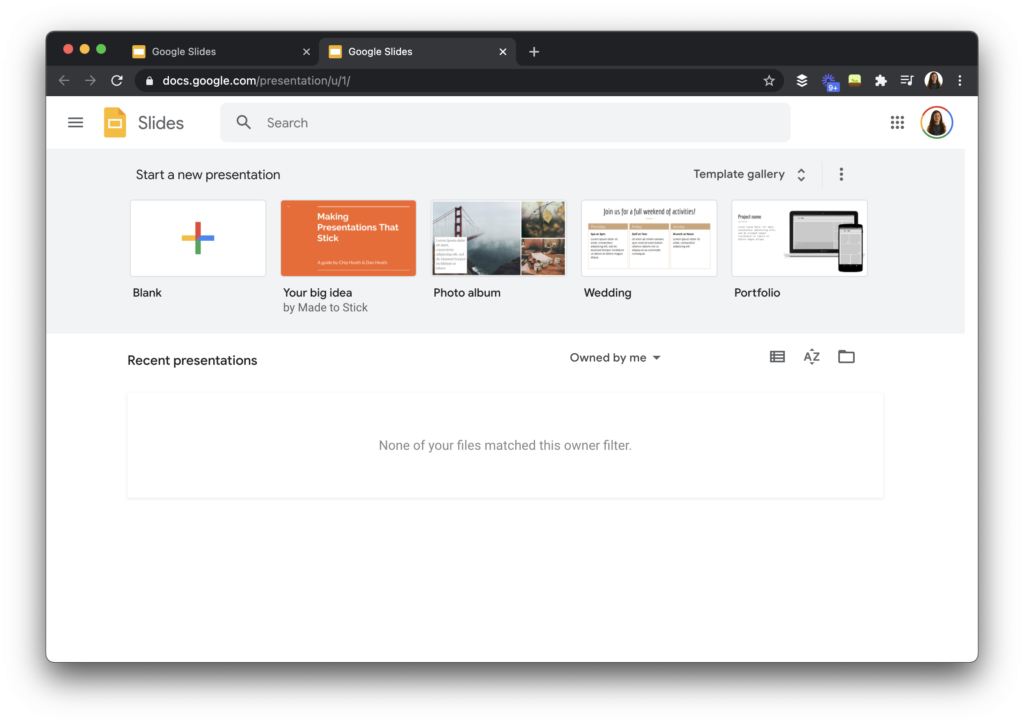
First, open up Google Slides by going to slides.google.com or access a new slide presentation in Google Drive. This can be a blank presentation, since the only function of this slide deck is to use the live caption feature as you present.
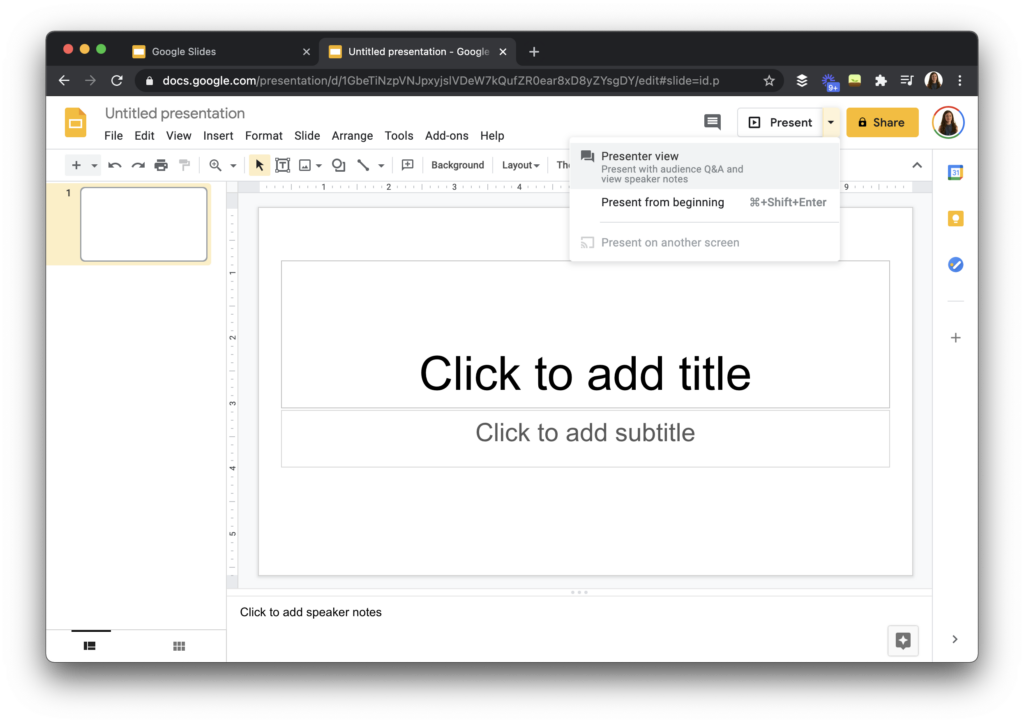
Use the dropdown menu to choose “Presenter View” which will make a preview box with speaker notes and a full window of the slide deck pop up.
Then, extend your web browser so it fills up your entire screen. You don’t want it to be “full screen” but you want it to fill up your screen so that you can then add your presentation deck, or another web browser on top of it.
Setting up Your Presentation
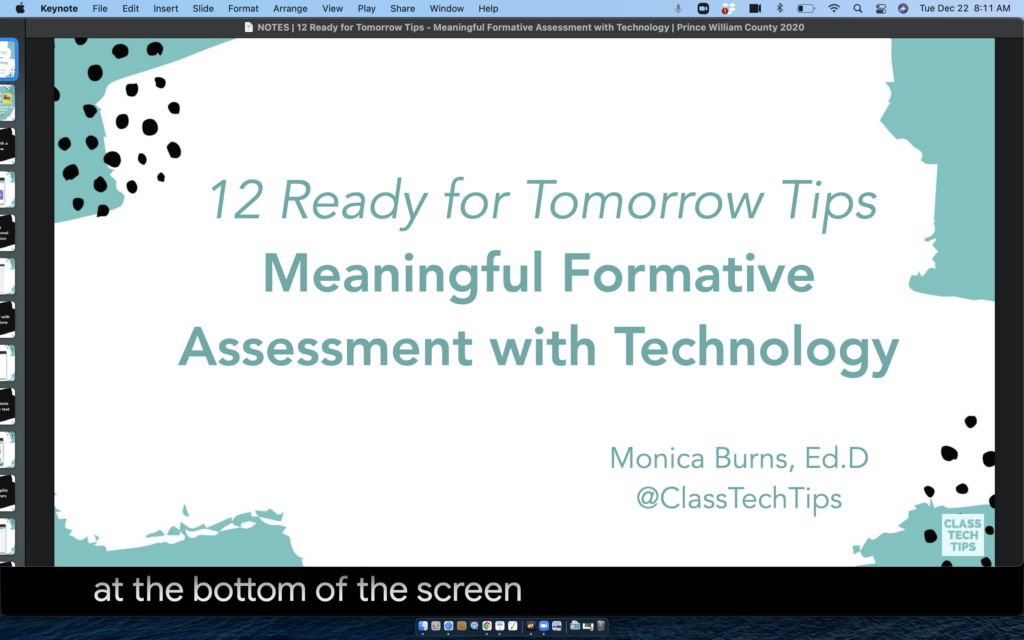
In the screenshot below you can see how I can layer another web browser window (this one shows Nearpod). Now I can demo the tool for anyone on my webinar or virtual presentation and still have the captions run at the same time.
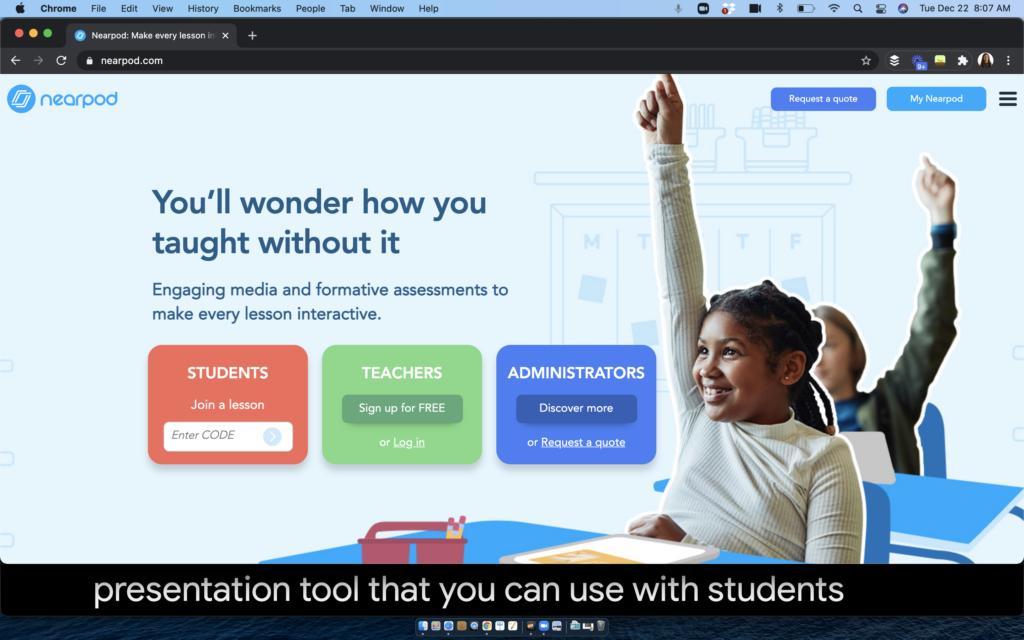
The same thing goes for when I am sharing a slide deck. As you can see in the screenshot below, I can also layer my slide deck on top of the Google Slides presentation showing the captions. This means I can share my screen showing my slide deck, and have the captions running at the bottom of the screen.
A note: Some video conferencing tools have captioning built into the platform. If this is the case, you can direct participants to turn on or off live captioning at the start of your presentation.
Have you tried out this caption hack for virtual presentations or webinars? Check out this YouTube video to see the steps in action, and share your experience in the comments below.