I’ve had the pleasure of working with this company. All opinions are my own.
With so many more teachers jumping into Google Classroom this year, I wanted to share a quick tip to personalize this space. Google Classroom lets you update the theme to help differentiate your classes. This way, students can see on their dashboard the different courses that they are a part of, all with varying header images chosen by their teachers. Learn the steps for creating your own Google Classroom banner and customizing the header image for Google Classroom.
In this blog post, I’ll share a strategy to let you further customize these banner images. Using Spark Post, you can create a graphic to upload right into Google Classroom. I’m a big fan of the Adobe Spark tools, and Ben Forta and I even wrote a book about ways to use this powerful creation tool. You can learn all about our book here.
Let’s dive into the steps for creating your own Google Classroom banner!
How to Create a Custom Google Classroom Banner
In the steps below, you’ll see screenshots from Google Classroom and Adobe Spark’s website. In addition to using Spark Post on the web, there is an Android and iOS app you can use, too.
What size is the header in Google Classroom?
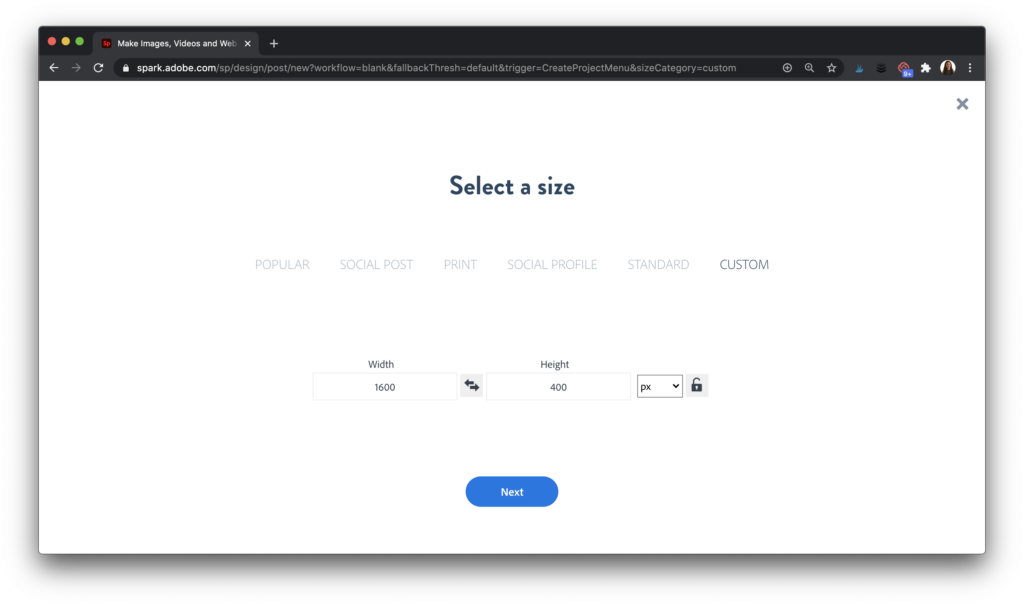
As I’m writing this to you today, the best dimensions to use are 1600 x 400 pixels. If Google Classroom gets an update, these dimensions might change, but you have the option to crop the image. So if you have a picture that isn’t the perfect size, you can trim it to fit better.
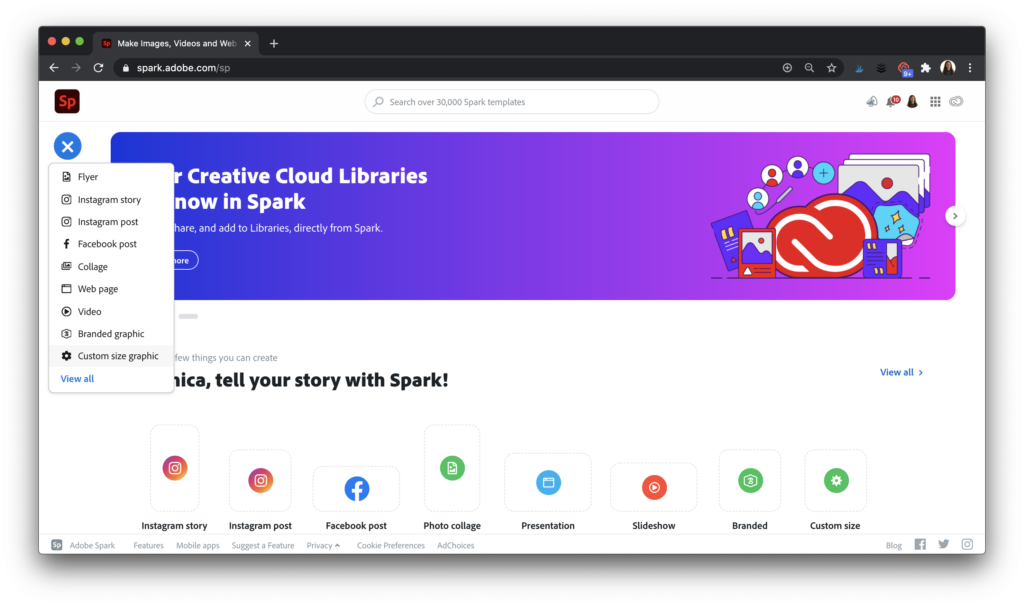
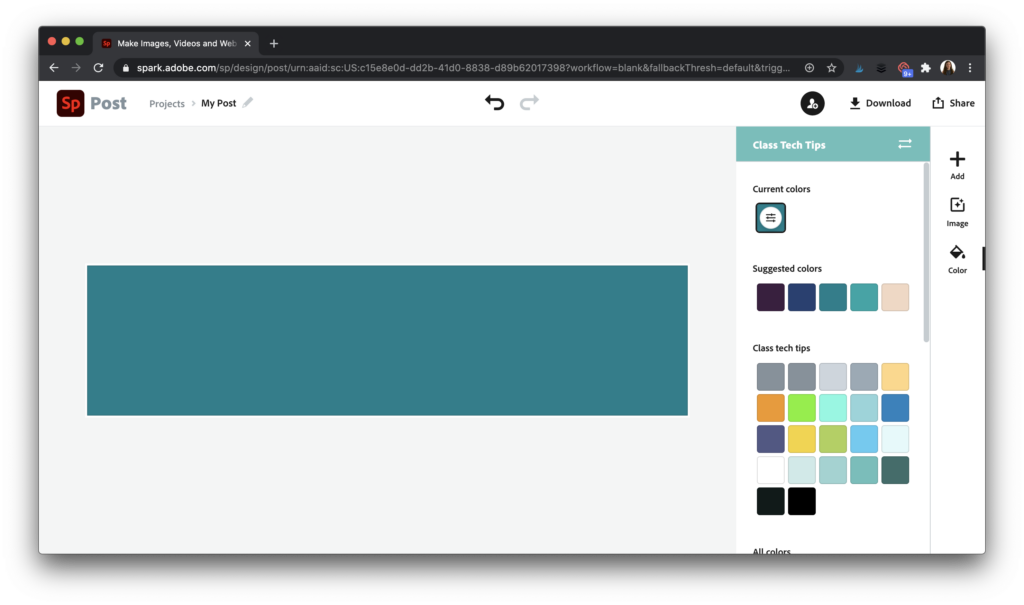
To create your customized Google Classroom banner, head over to Adobe Spark’s website. Choose the Custom Size Graphic option, as you see in the screenshot above. Then type in the dimensions of 1600 for the length and 400 for the width. Make sure that you choose pixels as the measurement of length.
What should I put on my Google Classroom banner?
First, choose a color for your banner that you plan to stick with over the school year. A bright or bold color works best. You can change the color using the options on the right hand side of the screen.
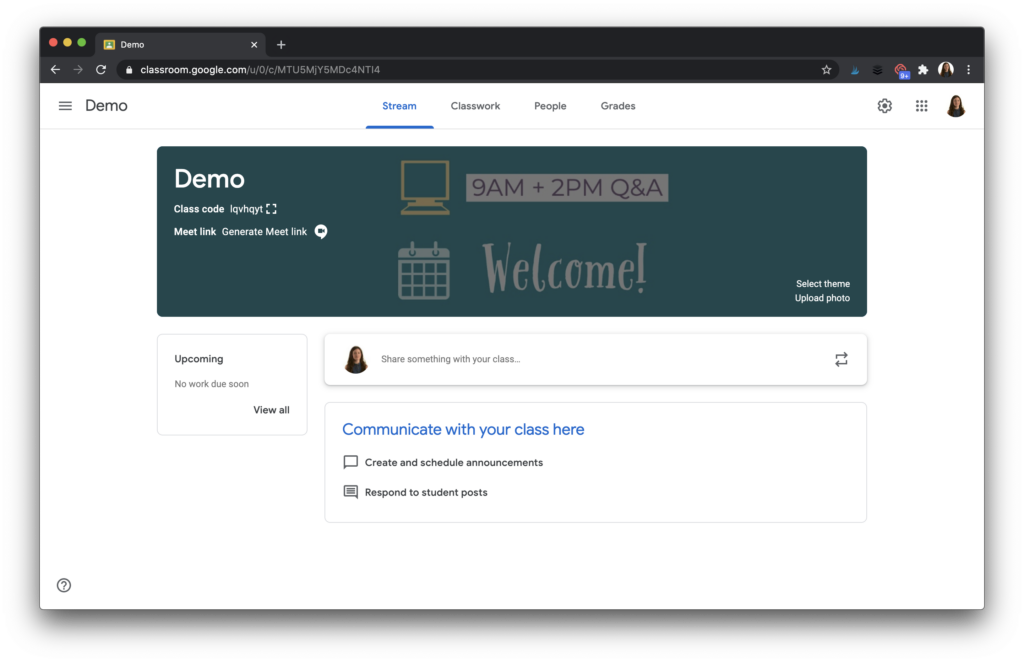
Specific information will automatically appear when you are in Google Classroom, including the class and code. This information will appear layered over your image, so you don’t need to add this to your custom banner. Instead, you might put a reminder, like the time of your weekly or daily meetings, or other information you know students will want regular access to throughout the year.
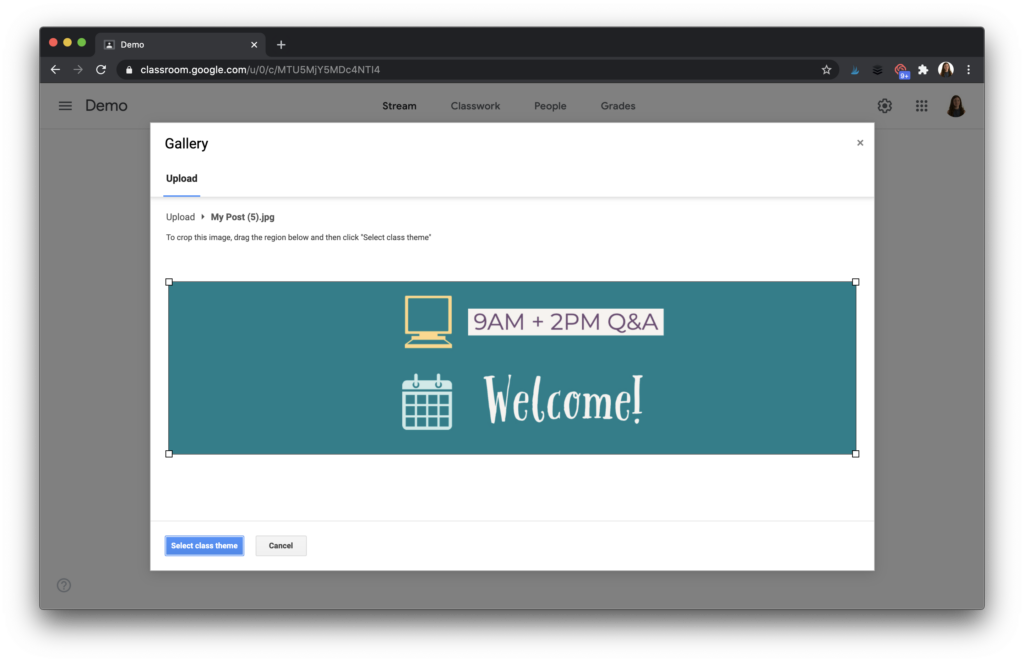
In the example I’ve shared with you, I added a reminder about the times for live Q&A each day and a quick Welcome! message. Here are a few more ideas:
- Bit.ly link to a breakout room
- Teacher email
- Class website link
- Class slogan
- Teacher Bitmoji
Tip: Place any information you add in the center of the screen. This way, you won’t have any additional text (classroom name, Google Meet code, etc.) covering up the message you’ve added.
How do you change the banner image in Google Classroom?
Once you’ve made your banner, you can download it as a JPG file. This action will save it to your computer, and you will then upload it to Google Classroom. When you’re back on your classroom page, open up the class you’d like to customize. On the bottom right-hand corner, you’ll see a link that says “Upload photo.” This button lets you select an image to add to the background.
You may be prompted to crop the image or reposition it. With the dimensions I gave you at the top of the post, you should be all set. Just stretch the corners to make sure your entire image fills up the space.
Since you can update the cover by quickly uploading a new file, you might jump into Spark and make a few edits to your image if you ever need to update information. You might change up the header’s information once a month or put a seasonal icon as you enter a new time of year. To make sure any changes aren’t confusing for students, I would recommend sticking with the same background color throughout the school year.
If you’re looking for a few more Adobe Spark combos, here are a couple to explore:
- Spark Post + Flipgrid Shorts = An Epic Combo
- How to Use Adobe Spark to Make TikTok Videos
- How to Make Images for Google Keep Notes with Spark Post
I can’t wait to see what you create with Spark Post! If you want to share your covers on social media, make sure to use the hashtag #AdobeEduCreative in your social posts. Use this link to get started with Spark for Education.