This summer, I’ve had the opportunity to work with students who created videos on a variety of topics. From tips for new Minecraft users to recommendations for favorite books, the focus of their creations has varied greatly. One conversation we’ve had regardless of the subject of their video is how they can connect with their audience. Adding captions to their videos, choosing music to communicate the tone, or tailoring colors to connect a theme, are all options for students with Spark Video.
Captioning Tools for Videos
There are a few different ways to add captions to videos that you create this school year. When I create video recordings to share on Facebook, I will often use their auto-generate feature to add captions to my video. This option lets me go in and edit the captions to make sure it captured my words correctly.
When I create videos for Instagram stories, I often manually add captions. First, I replay the video recording before I post it. Then, I type in the words that I said in the video and add them to the bottom of the screen so someone can read instead of listen. When I create videos for the Easy EdTech Club, I use the tool Rev.com to create an SRT file that I upload alongside my video. This way someone can decide to turn captions on or off. And when I create videos for IGTV or Linkedin, I often use Quicc.io to create captions and “burn” them onto the video itself.
There are a handful of tools for adding captions to videos, and some of the ways I mentioned above are free, while others come with a price tag. As students create videos this year, they can add captions to their creations in just a few steps. In this blog post, I’ll take you through tips to add captions to student (and teacher) Spark Video creations this school year.
New to Adobe Spark? Check out this blog post.
Adding Captions to Spark Video
In theses steps, you’ll see which features of Spark Video that make it easy to add captions to your video. I’ve shared screenshots from a Chrome web browser below. If you are working on the Spark Video iOS app, the options will be the same, but the navigation may be different as you try out the tips below.
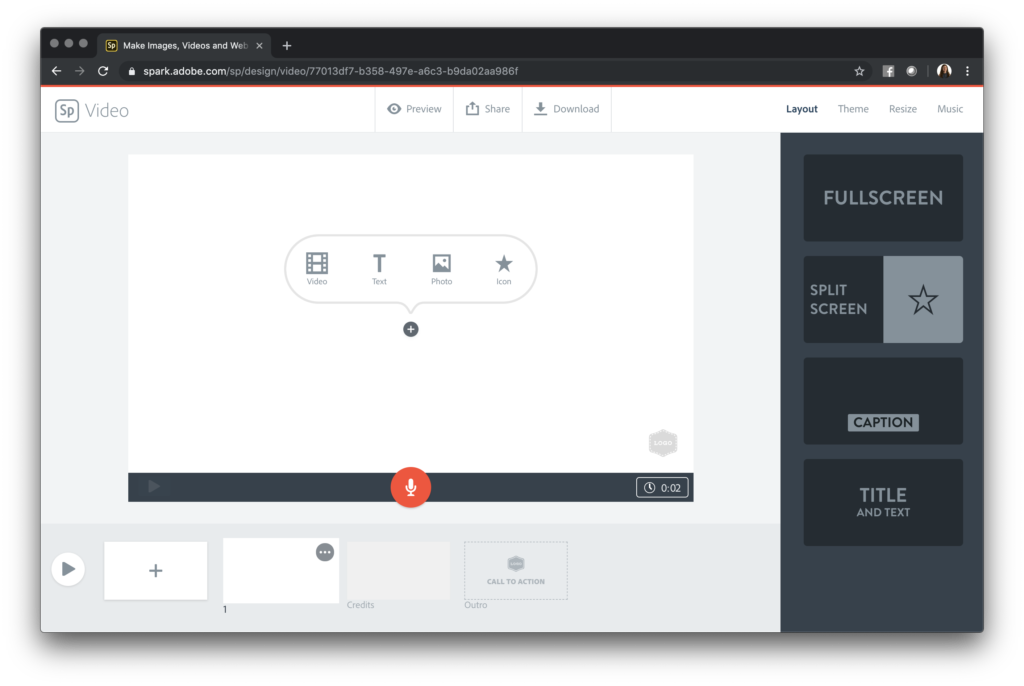
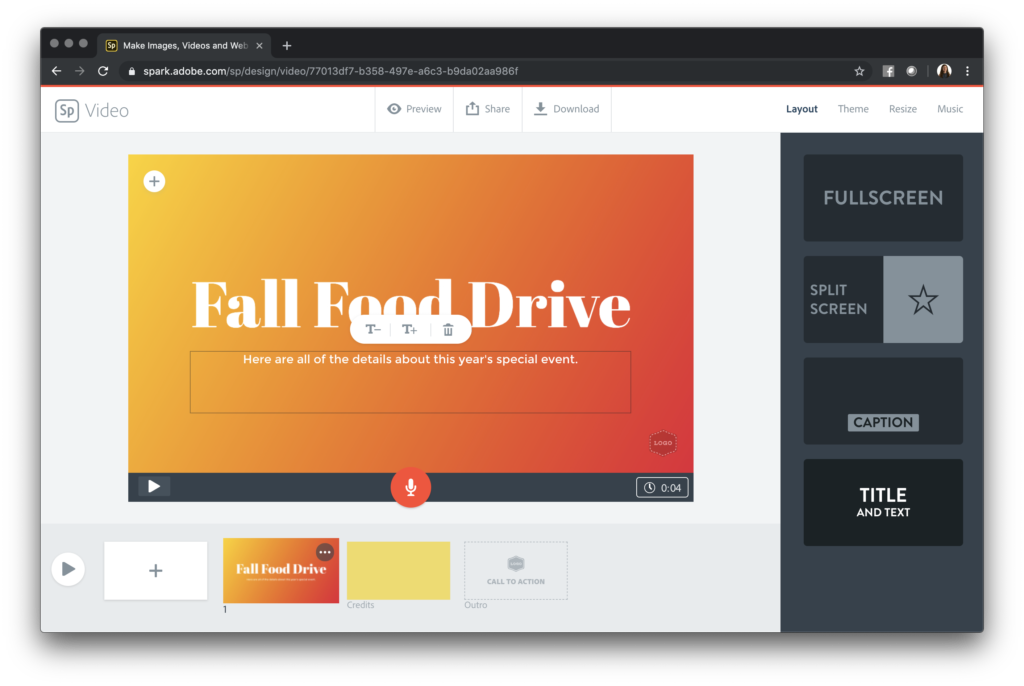
When you open up Spark Video, the first slide of your project will default to a Fullscreen slide. Using the Layout button on the top righthand corner of the screen, change the layout to “Title & Text.” This layout option will give you space to add a title to your slide as well as a caption below. Your students might find it easier to type in what they would like to say, then press the record button to add their voice.
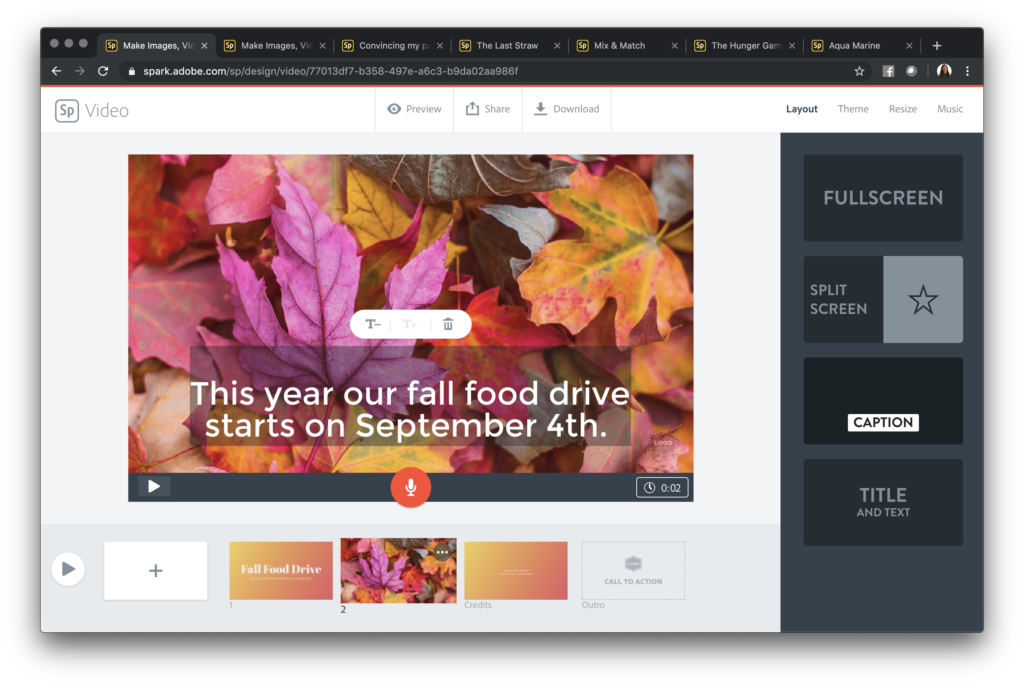
As you can see in the screenshot below, you can also use the “Caption” layout option. Depending on your theme, the caption can go on top of a picture with light highlighting behind it. You can also use the “Hand” tool to move the caption to a different location on the screen.
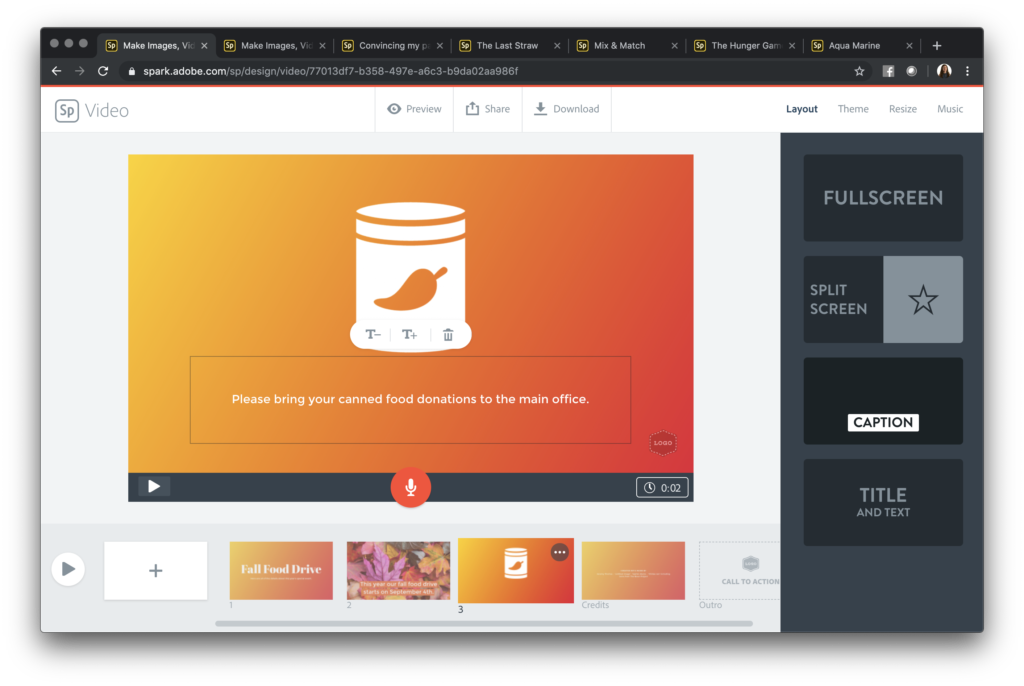
The “Caption” layout also gives students the option to add an icon to their screen. They can search through The Noun Project library to choose the perfect icon for their video.
Voice-to-Text Tools
If students are using a script alongside their recording or creating videos on the fly, they can use a voice-to-text tool to capture their narration. As students record their voice in Spark Video, they can use a voice-to-text tool on the same device, or a separate device by their side. Then they can copy and paste the text into the caption of their Spark Video.
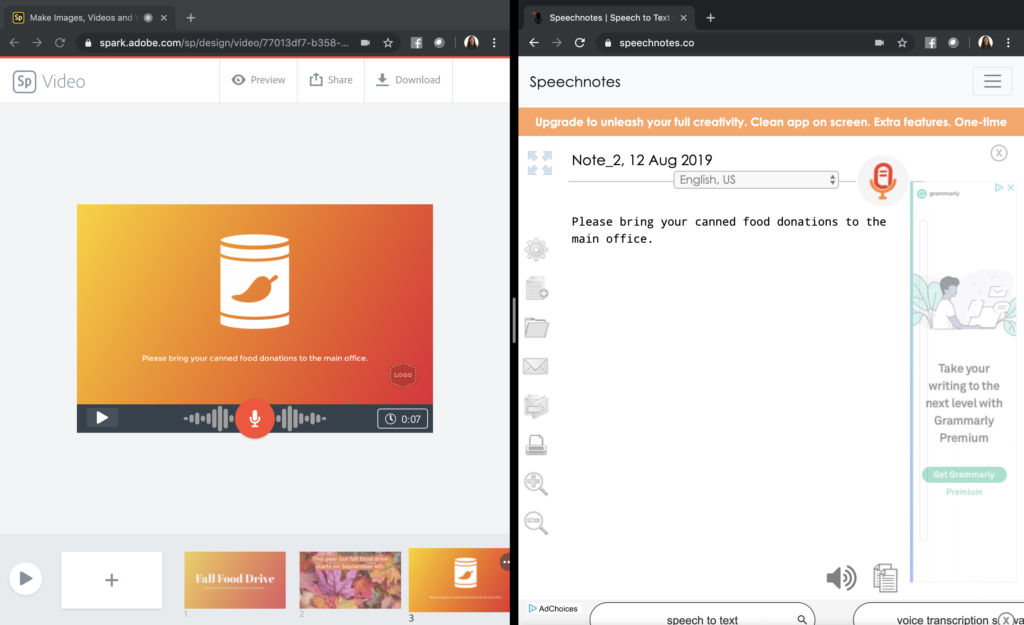
Some computers have voice-to-text options built into their device. You might also explore a tool like Speechnotes. You can pull up this free tool side-by-side with your Spark Video project. As you record your voice in Spark, Speechnotes will capture your voice and turn it into text. After you make any edits (it’s not perfect, but pretty good), you can copy and paste the text into the caption of your Spark Video.
Planning with Scripting
When students plan their Spark Video, you might use a planning page like this one. Alternatively, you may have students work in a space like a Google Doc where they can easily copy and paste their script into a caption. If students are working with this in mind, you can have students record their voice slide by slide and add their caption as they go.
A best practice for Spark Video creation — whether you are adding captions or not — is to have the narration for each slide be about the length of one sentence. Using this suggestion as your students move through the video creation process can help remind them to keep their story moving with visuals.
Download these free planning pages for using Spark Video in your classroom.
Captions without a Script
Want to add captions to a video you’ve already created? Download your Spark Video as an MP4 file. Then you can add captions using free or paid tools.
If you download your Spark Video creation as an MP4 file, you will have additional options for adding captions. Imagine you or your students are creating a video sharing information about an upcoming school event. After you or your students have completed their video, download the video to your device. It will save as an MP4 file giving you a handful of options for sharing — and adding captions.
As a free option, you can upload the video to a school Facebook page to share with families. When you go to post the video, you will see an option for captions. This feature will auto-generate captions that you can edit before posting it to a school Facebook page.
As a paid option, you can upload your video to a tool like Quicc, and it will generate captions for your video. You can edit the captions, change the color, font, and placement, and save your video with the captions right on the screen. This tool might be worth the investment if you have created a handful of Spark Videos in the past and want to add captions quickly.
Ready to get started? Head over to Spark for Education’s landing page to learn how to set up your school to get all of the upgraded features totally for free! This excellent open-ended creation tool is an absolute favorite, and you can find more classroom ideas in Ben Forta and my book, “40 Ways to Inject Creativity in the Classroom with Adobe Spark.”