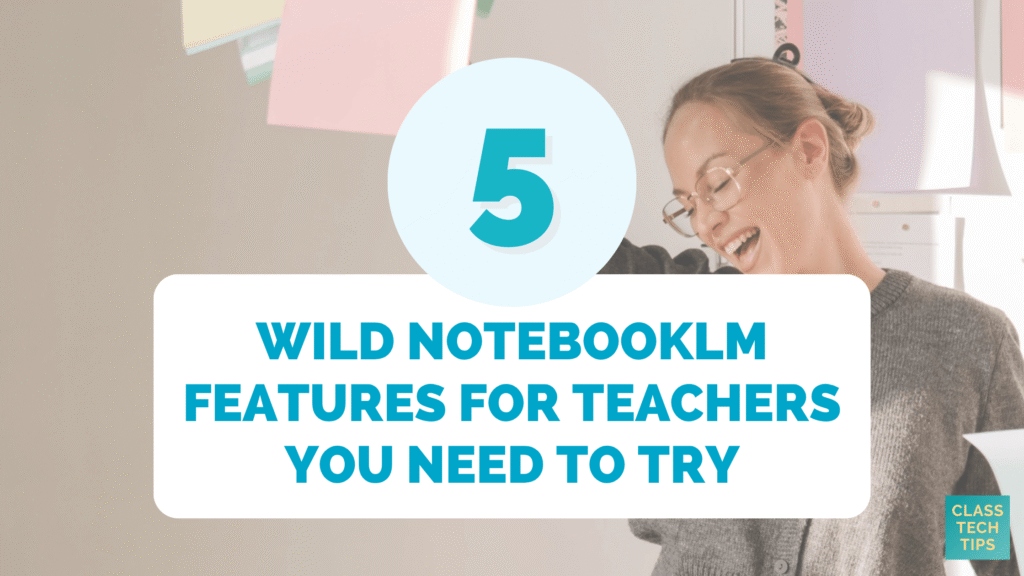
Have you spent time in NotebookLM recently? If you’ve been using NotebookLM to create audio overviews or chat with your uploaded documents, you’re already off to a great start! But there are some NotebookLM features that go way beyond basic Q&A, that are perfect for teachers. Once you see what’s possible, I have a feeling you’ll want to start building one or two of these content creation options into your lesson prep right away.
It’s been a busy start to the year, and I’ve been on the road the past two weeks working with educators in different corners of the country (literally New York to Oregon). At these in-person events, and during webinars, I’ve spotlighted some new features I wanted to highlight on the blog, too.
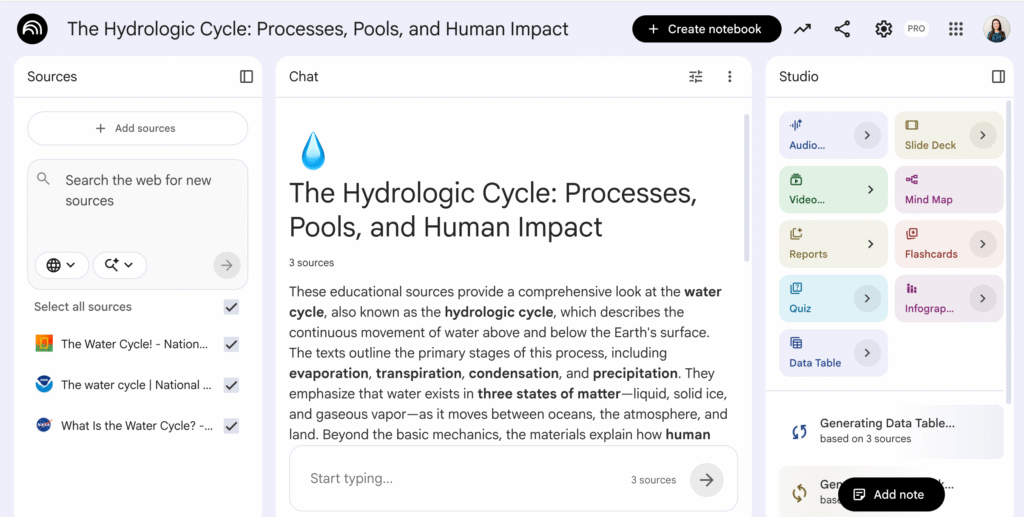
Every time I head to the Studio tab in NotebookLM, there is something new to show a group. The tools inside NotebookLM have expanded so much that it’s become one of my “must-share” tools when leading sessions for K-12 teachers.
If you’re brand new to NotebookLM, you can also check out my post on 5 Ways Teachers Can Use NotebookLM Today or my Quick Overview of NotebookLM podcast episode.
How to Access These NotebookLM Features
In this blog post, I have just five features to take you through. All five of these NotebookLM features for teachers live inside the Studio tab on the right side of your NotebookLM screen.
An important note, don’t just click on the tool you want. Instead, hover over it until you see a small arrow appear. Click on that arrow, and it will open up all of the customization options. The customization options that take each feature from pretty great to excellent.
Another thing to consider is that these tools can take a little bit of time to generate content for you, especially the video and audio options. This isn’t something you’ll want to create on the fly for a group. Instead, you’ll want to build it into your regular prep routine for a lesson or activity.
If you’re planning to share these features with colleagues, create a few examples ahead of time. That’s what I do when I host professional development webinars and workshops. I walk through the process live so participants can see how it works, and then I show a finished product I’ve already created so we’re not all sitting and waiting for it to generate.
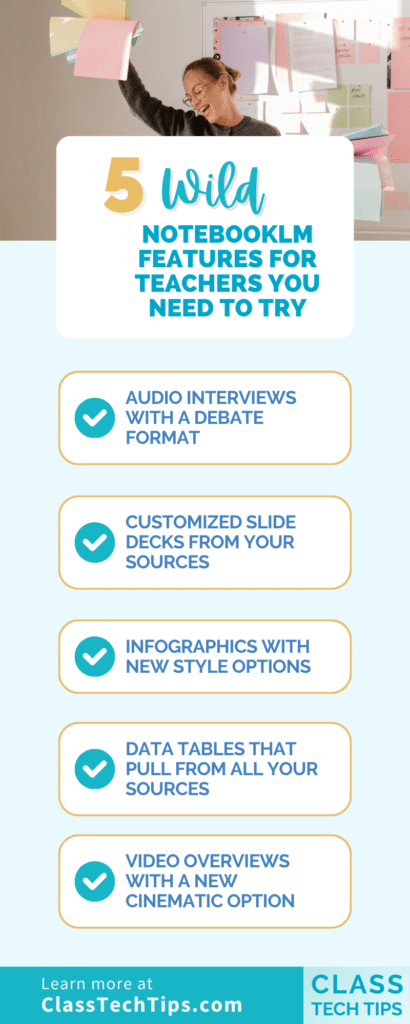
NotebookLM Features for Teachers
As I mentioned earlier, there is so much you can do inside of NotebookLM, and I’m just highlighting a few favorites. Let’s jump into the list.
Audio Interviews with a Debate Format
The audio overview feature has been the standout in NotebookLM for a while now, and for good reason. It turns your uploaded sources into a podcast-style conversation that’s pretty strong. But the debate format takes this to a whole new level.
Instead of a friendly overview, the debate option creates an audio recording where two voices argue different sides of a topic using your source material. This is one of my favorite NotebookLM features for teachers because of how useful it is as a classroom exemplar. If you want your students to debate a particular topic, you can generate a debate audio to model what a strong argument sounds like from both perspectives.
When might you share this with students? Play it at the start of a unit, use it as a discussion starter, or share it with students who need a model before they prepare their own arguments.
A middle school social studies teacher could upload primary sources about westward expansion and generate a debate on its impact. A high school science teacher could create a debate around renewable vs. nonrenewable energy using articles from their unit. The possibilities are really endless!
Customized Slide Decks from Your Sources
This feature is fantastic! NotebookLM can generate slide decks directly from your uploaded sources, and you get to choose between a detailed deck and a presenter deck. What makes this so powerful is the level of customization. You can describe the kind of slide deck you want, and it will shape the content around your request.
For example, I created a slide deck around the Grand Canyon, but instead of asking for a general overview, I focused it on a vocabulary spotlight. The result was a set of slides built around key terms and definitions pulled from my sources, which is completely different from what you’d get if you asked for a broad overview of the same topic. That ability to steer the focus is what makes this one of the most versatile NotebookLM features for teachers.
The slide generator has been around for a bit now, but one new addition that’s pretty wild is the edit option. You can now go into the slides you’ve created and edit them individually. This means you can tweak text, adjust the focus of a single slide, or rework content without starting over. Just keep in mind that this editing feature only works with slide decks you’ve created recently (or something you create today). If you generated something before this feature was released, you won’t be able to edit those older creations.

What might this look like in action? An elementary teacher could upload a set of reading passages and create a vocabulary-focused deck for word work stations. A high school history teacher could generate a presenter deck for a lecture on the Civil Rights Movement.
If you love using slides in the classroom, you’ll also want to check out my post on how to make a slide deck with Gemini. It’s another great option for slide creation.
Infographics with New Style Options
I’ve loved the infographic feature in NotebookLM since it was first released, but it’s gotten even better. You now have the opportunity to choose from different visual styles when you create an infographic. There’s a sketchnote style that feels hand-drawn and a more scientific look for data-heavy content. You’ll even find an anime-inspired option that’s sure to grab student attention.
On top of the style choices, you can also select the orientation and the level of detail. You also have the option to add any extra notes you want to make sure it includes.
A science teacher could upload lab data and generate a scientific-style infographic summarizing key findings. An ELA teacher could create a sketch note infographic mapping out the themes of a series of short passages. For a deeper look at how you might use infographics, check out my post on How to Make Classroom Infographics with AI.
Data Tables That Pull from All Your Sources
If you’re a table person, this one is for you. I am absolutely a table person! And if you’ve joined me for a workshop, you’ve probably seen me reformat information from a list or paragraph into a table using a chatbot like ChatGPT or Gemini. What makes the data table feature in NotebookLM different? This feature pulls data from all of the sources you’ve uploaded into your notebook, not just a single document.
This is especially useful if you’re looking to make a cross-curricular connection or pull out data related to numbers and patterns. You might upload several articles about climate change. Then, you can ask NotebookLM to create a table comparing data points across the sources. Or upload a set of historical documents and generate a table of key dates, figures, and outcomes. In the example below, I asked for a table full of research ideas for different grade levels. It gave me ideas based on the information in my Water Cycle Notebook.
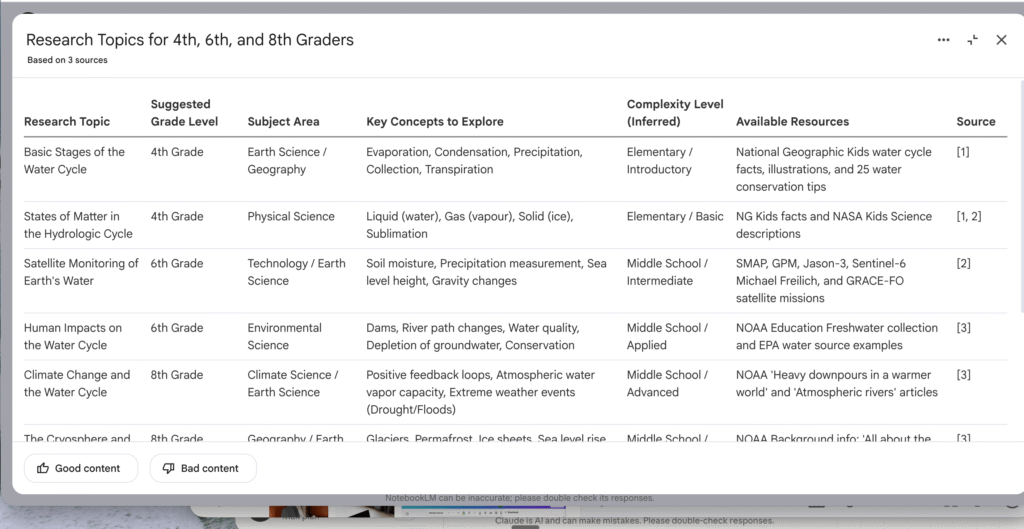
A math teacher could upload word problems and generate a table organizing the key information students need to solve each one. An elementary teacher could use it to create a comparison table across different read-alouds in a text set. This is one of those NotebookLM features for teachers that saves serious time on resource creation. It can help you build something you simply would never have time for otherwise. For more time-saving strategies, take a look at 3 Time-Consuming Tasks AI Can Help Teachers Tackle.
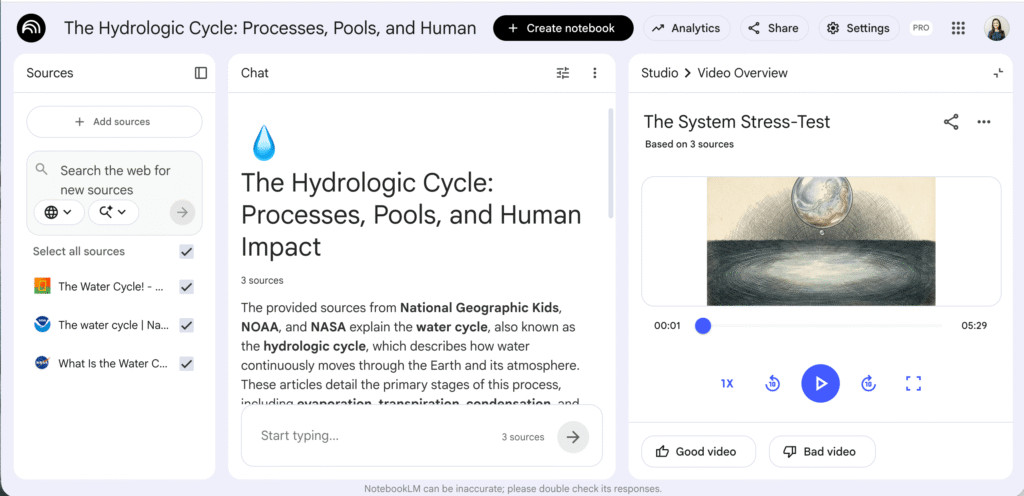
Video Overviews with a New Cinematic Option
You might have already tried the video overview feature to create a brief, bite-sized overview or an explainer video from your sources. It’s a great way to give students a quick visual summary of a topic. But there’s now a new cinematic option that’s more about visuals and storytelling, and it’s worth trying out.
The cinematic format creates a more polished, narrative-driven video. It feels less like a summary and more like a mini documentary. This format is perfect for hooking students at the start of a lesson. It can give them a visually rich introduction to a new topic.
A geography teacher could upload sources about ocean ecosystems. Then, they can and generate a cinematic video to kick off a marine biology unit. A music teacher could upload articles about a composer and create a visual storytelling piece for students to watch. ILooking for more ways to bring video into your teaching? Check out my tips on YouTube in the Classroom.
Start Exploring These NotebookLM Features for Teachers
These five features represent just how much NotebookLM has grown as a tool for educators. Whether you’re creating a debate (audio overview) to model argumentation, building a vocabulary-focused slide deck, designing a sketchnote infographic, organizing data into tables, or producing a cinematic video overview, there’s something here for every content area and grade level.
I’d love to hear which of these NotebookLM features for teachers you try first. Use the box below to get on my newsletter list and then reply to my email with your thoughts, ideas, and questions!