If you’ve worked with elementary school-aged students, you know they have stories to tell. Whether they are recounting an adventure on the playground, sharing a special moment from a birthday party, or crafting their own imagined narrative, students of all ages are storytellers. Last month I had the opportunity to work with a fantastic group of six, seven, and eight-year-old students in New York City. I want to share an engaging, storytelling activity for kids that you may want to replicate in your classroom!
This action-packed week of programming took place at the Cooper Hewitt Design Museum in New York City. I was invited to lead programming for this group of enthusiastic students for a week in July. If you followed along on Instagram, you learned that I used to live just a few blocks from the museum and taught at an elementary school less than a mile away. It was lots of fun participating in this digital storytelling activity at the museum last month!
Student Storytelling Activity
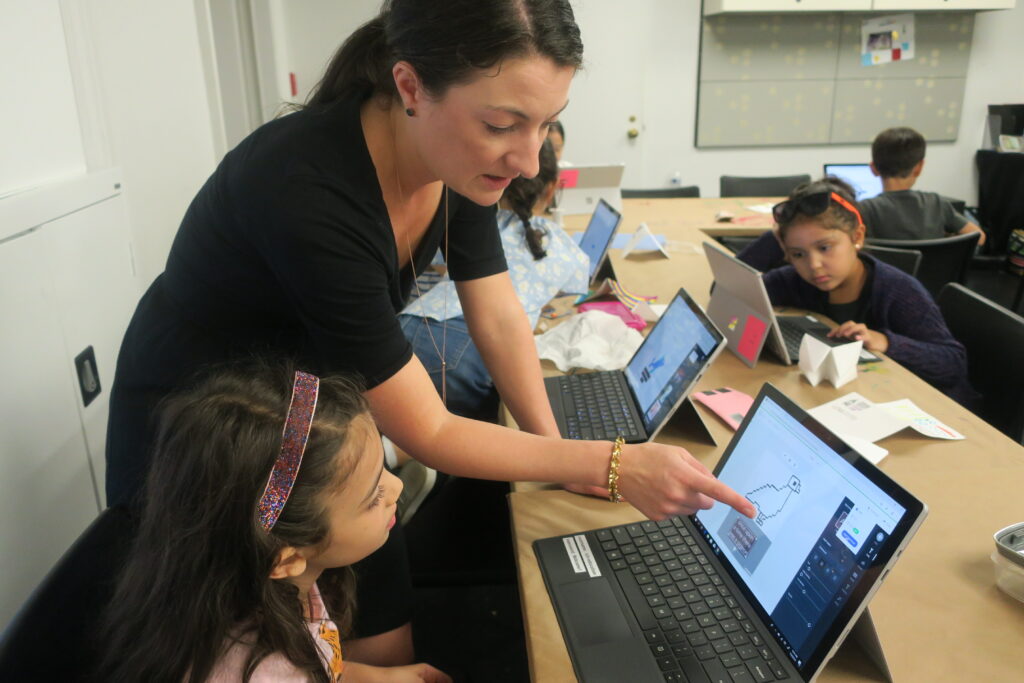
As you can see in some of the snaps below, students told a story in five parts. They created bitmap illustrations using paper and markers, and added colorful captions to each scene using Adobe Spark Post. Over a few days, students went from sharing their story ideas with a partner to illustrating their characters, and then finally using written words to breakdown each piece of their story. Here is a quick rundown of the resources you’ll need for this activity with more explanation below:
- Storytelling planning pages using a First, Then, Next, Next, Finally format; you can use your own or try out one of these free downloads I created
- Activity pages for illustrations (we used a grid to incorporate a discussion on bitmaps)
- Spark Post on iOS or the Web; find more information on setting up your school on this page
Storytelling Prompts for Students
At the start of the program, students were given design challenges that sparked a story idea. If you are planning this activity to align with your own standards, student interests, or cross-curricular connections, take that information into consideration.
For example, if you are exploring “community roles” with students, you might ask them to tell a story about the day in the life of someone in the community. Alternatively, if you know your students are excited about video games, you might ask them to tell a story about a character who overcame a challenge in a video game. If those same students are learning how to tell a story in sequence, you might introduce temporal words and ask them to include temporal words to signal the passage of time in their video game story.
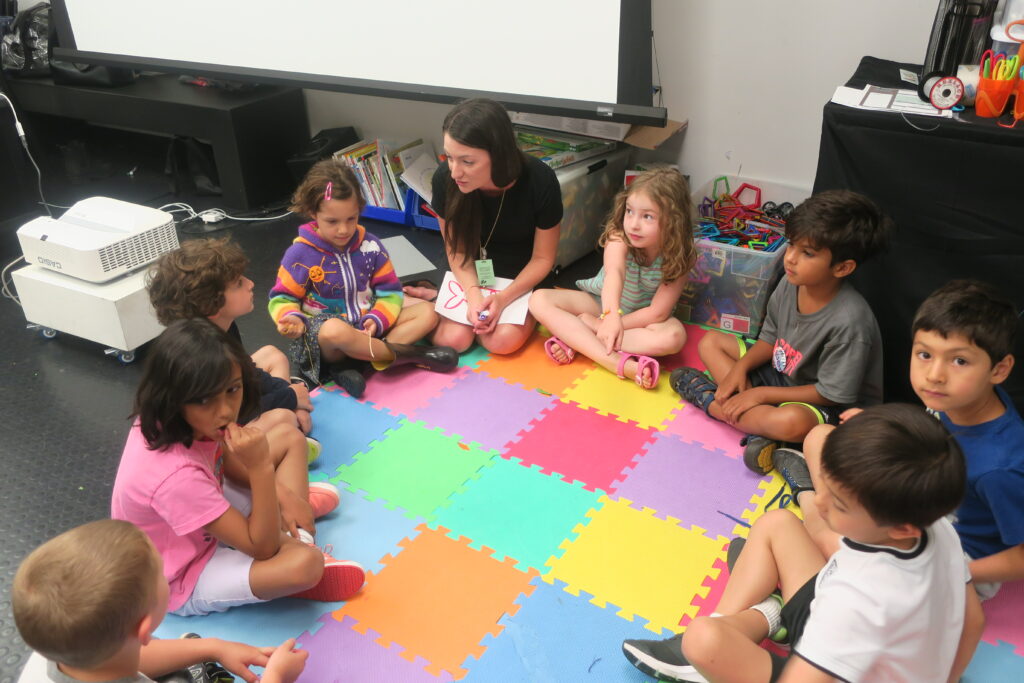
Once you have your storytelling prompt established, ask students to share their story with a partner. They can talk it out first before using a planning page to document each scene. With the group of students I worked with during this activity, we focused on having a sentence or two to go along with each of the five scenes of the story. You will want to model for students your expectations that may vary depending on the content you are teaching.
Illustrating a Scene
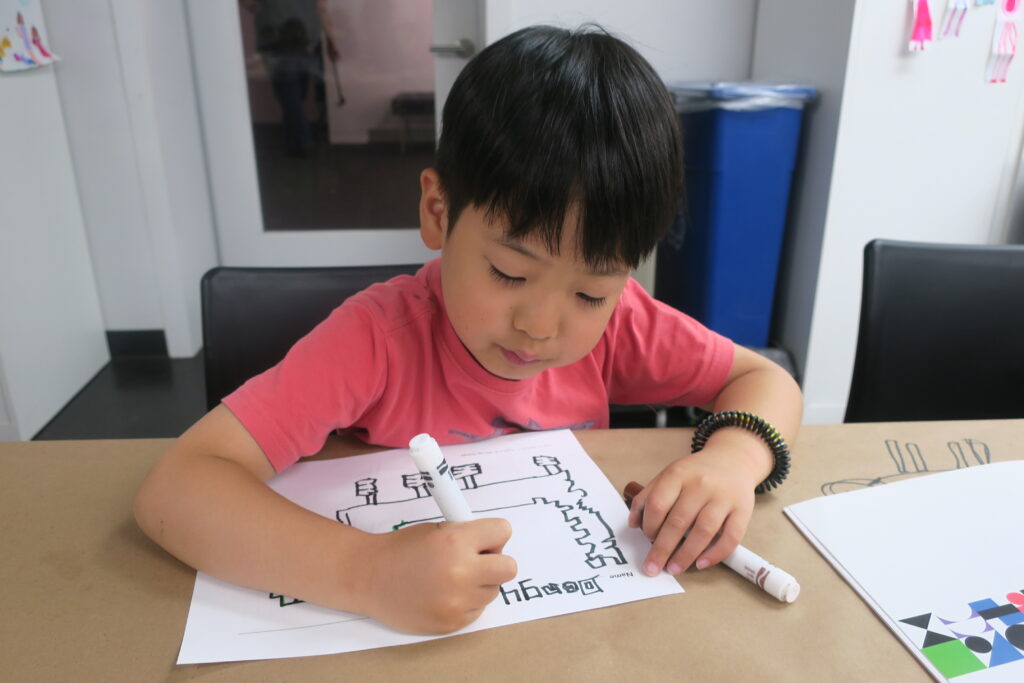
During this program, I introduced the concept of bitmaps to students, and they created illustrations of their characters by coloring each box of the grid. We used this as an opportunity to discuss the way graphics are created on computers before even opening up the Surface Tablets and talking about Spark Post. You might decide to have students illustrate scenes from their story with:
- an online drawing tool
- construction paper to make a collage
- using grid paper (like we did)
There is no right way to have students create an illustration for a story. However, you will want students to have a picture file they can upload to Spark Post. So if students create an illustration on the computer, they will need to export it and save it to their device. If students create an illustration or collage on paper, they will have to snap a picture, so it saves to their computer.
Your workflow will vary depending on your device. If students are working on paper, you might want them to snap a picture of their drawing using the webcam, so it saves automatically to their device.
Creating Posters with Spark Post
The next step for this project was to have students create a poster using Spark Post and add a caption for each scene. Instead of having students snap pictures using the webcam on their device, the amazing team at Cooper Hewitt scanned each student’s five drawings. Then they uploaded each student’s drawings to a folder on their corresponding device. This way, when students came back to their devices, the picture files of their illustrations were ready for them to access.
Then students opened up Spark Post and logged into their account. Since this week of digital storytelling took place over the summertime, families set up an account for their child. If you’re working in a school and need to set up Spark for Education (it’s totally free) visit this link for more information.
Setting Up Spark Post
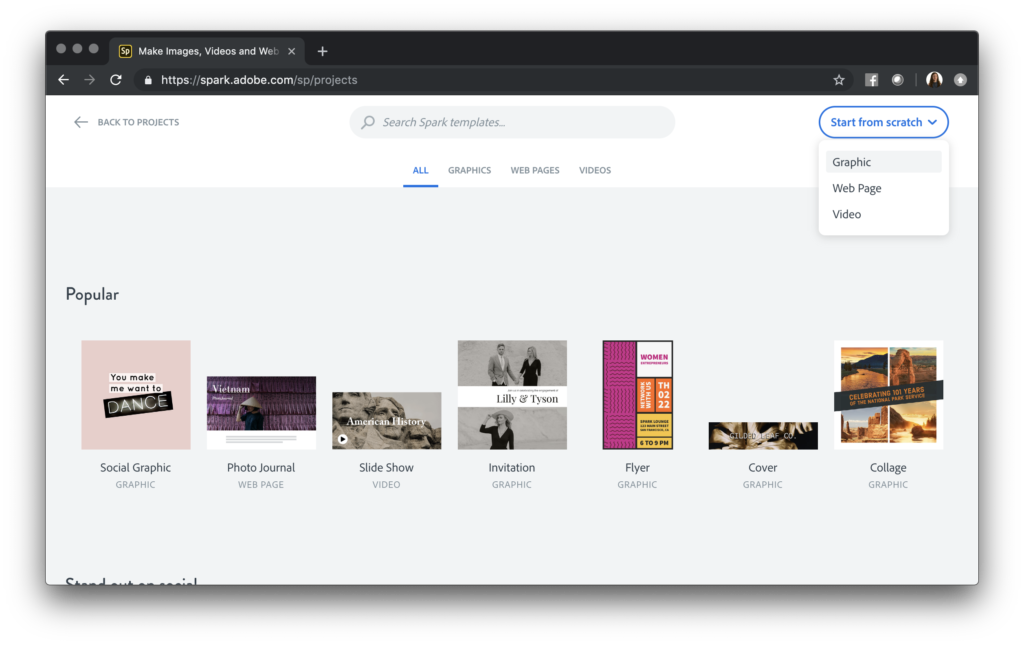
Once students opened up Spark Post, they choose the option to create a new graphic as you can see in the screenshot below. Students will also see the options to create a project using Spark Video and Spark Page on this screen.
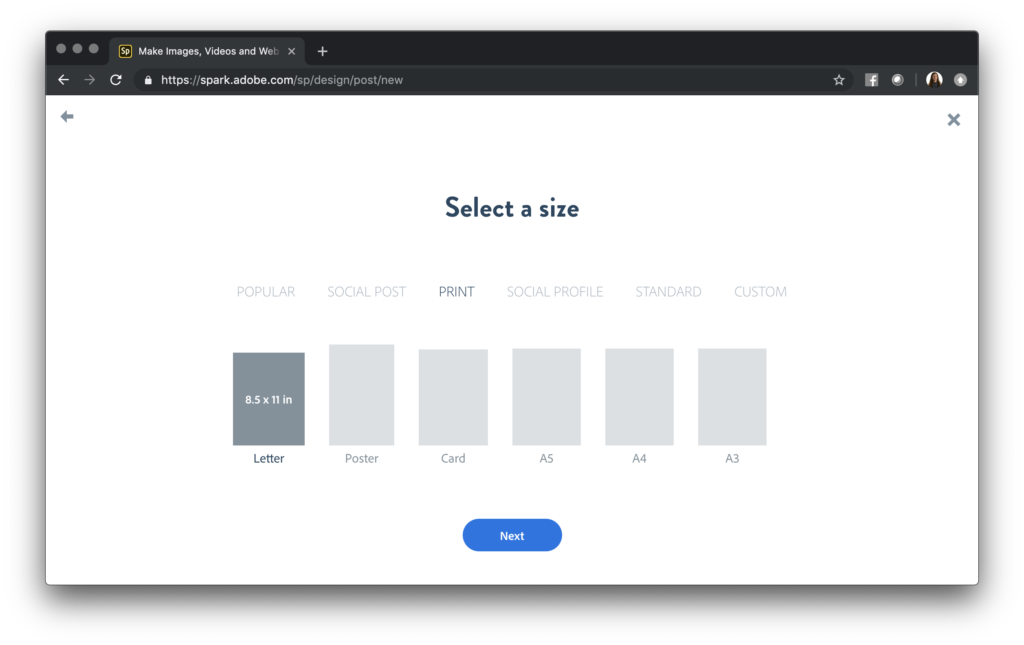
Then students choose a size for their poster. We asked students to select 8.5 x 11 because we knew we would print out their final creations onto cardstock paper to display. However, you can have students choose any option for their sizing.
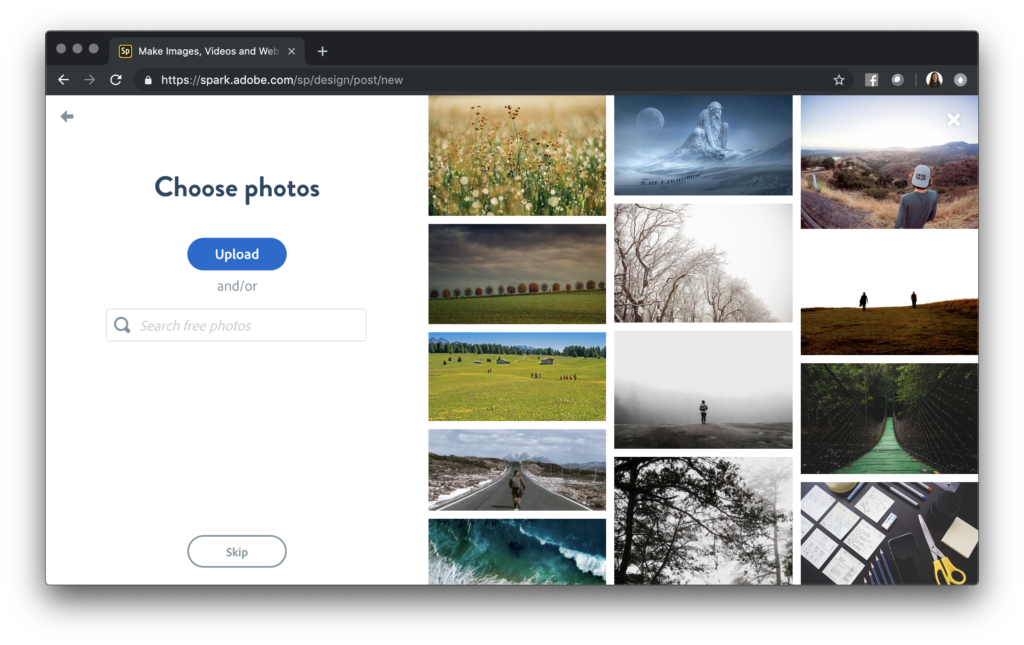
After opening Spark and choosing a graphic size, students are prompted to upload their own photo. In our case, students already had the images of their illustrations saved to their device. You will want to make sure students upload their pictures at this step since it will be the background for their poster.
Adding Captions to Posters
Since this group of students already used a planning page (like this one), they knew what they wanted the captions to say. You may want students to refer to any planning they’ve done at this stage as well. Using the text option, they can add their captions to their poster. Then students can change the color, font, and size of any captions. A few tips:
- Adobe Spark will use the colors in the illustration to suggest colors for the text; this is an excellent opportunity to talk about artificial intelligence with students
- We had students use the layout feature to add a color block to make sure the captions didn’t mask any of their drawings
- Students added their name to the first poster they created, similar to adding their name to a title slide or book cover
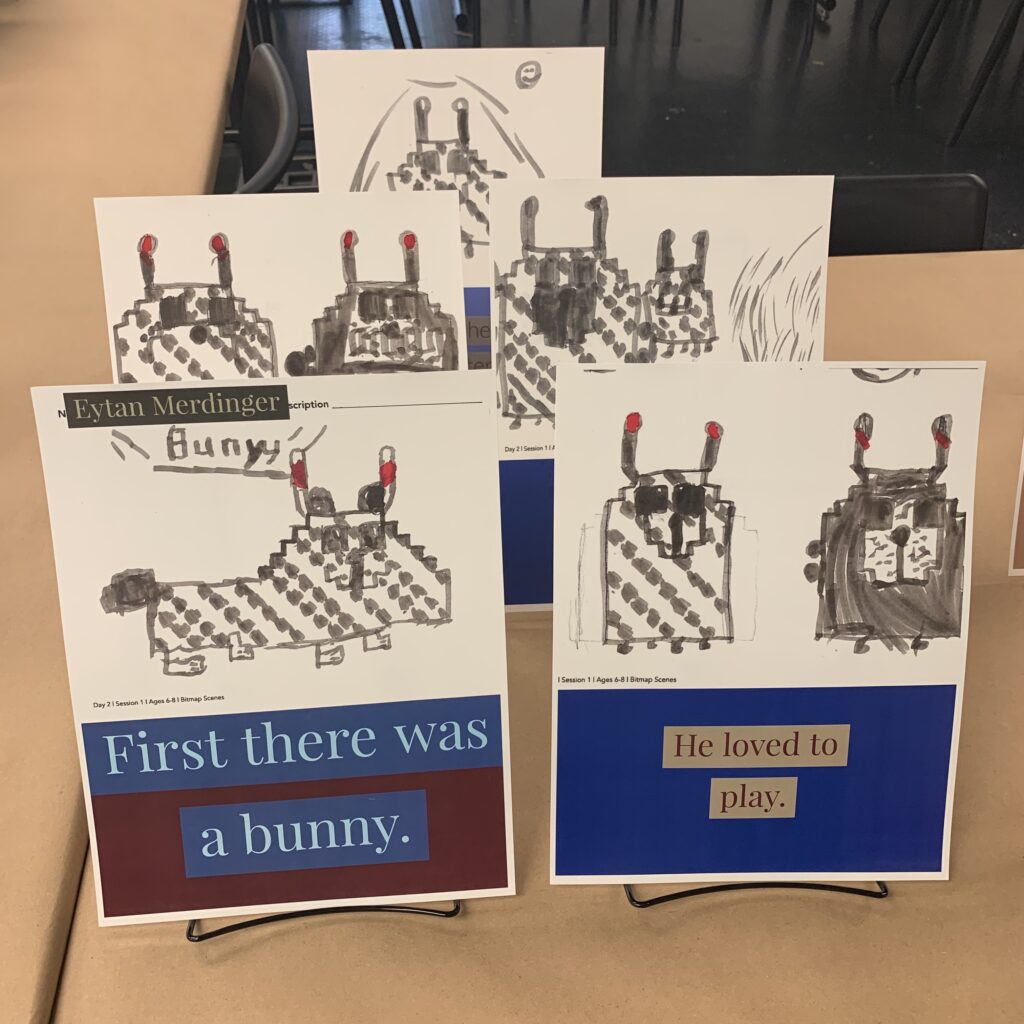
When students finished adding captions to each of their posters, they downloaded each scene as a PDF file. With their finished products in PDF format, each student had five posters that represented scenes from their stories. As you can see in the image above, the awesome team at Cooper Hewitt set up displays for each student. This way, they could show off their creations at a special family celebration that capped off the week.
If you’d like to get started with Adobe Spark, check out these fantastic “quick start” videos put together by Ben Forta. Ben and I wrote a book all about using Spark called 40 Ways to Inject Creativity in the Classroom with Adobe Spark. I can’t wait to hear about your take on this storytelling activity idea, leave a comment in the blog post with your own spin!