A few weeks ago I shared a post with a bookmarking tip for readers on iPads (see it here). In this post I included a few screenshots of my iPad with annotation to explain the steps of how to bookmark a website on your iPad. Using the annotation tool on your iPad can be very useful when showing students how to accomplish a task. You might also want your students to annotate images on their iPad to demonstrate their understanding or explain their thinking.
The steps below outline how you can annotate a screenshot or any image on your iPad. At the bottom of this post you’ll find some ideas for using this trick with your students.

First, open up the image you would like to annotate in the Photos app on your iPad. When you select the photo you’ll see the icon next to “Done” which takes you to the annotation option.
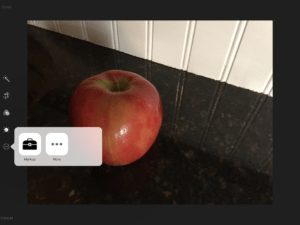
Next, tap on the last button on the lefthand side that takes you to the option “Markup.” Click on Markup to go to the annotation page.
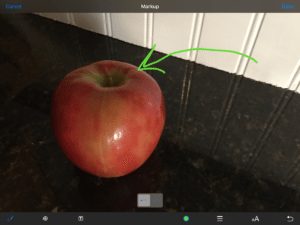
You can annotate the screen using your finger or a stylus (like this one or this one). If you draw a common shape like an arrow or a circle you’ll see a special option pop up on the bottom of the screen. This lets you decide if you want your drawing to be more crisp.
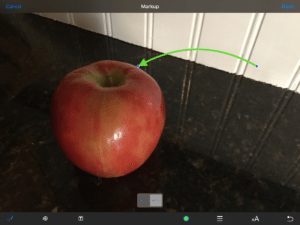
In the image above I chose to make my arrow look more crisp. Then I used the other options at the bottom righthand corner of the screen to change the color of my arrow to orange and make the line thicker.
The option to add text is on the bottom lefthand corner. Once you add text to your screen you can use the options shown above to customize the font, size and alignment. Just like the drawing tool, you can also
change the color of the text.
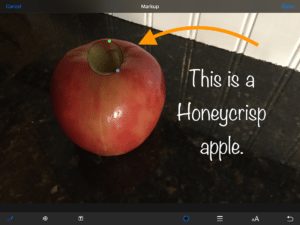
Depending on the type of image you annotate. The magnifying tool on the bottom lefthand corner might come in handy. You can see the magnifying circle hovering over the stem of the apple in the picture above. Make sure to tap on the “Done” button to save your annotations.
When might teachers annotate images on iPads?
- To show students how to navigate a website
- To point out a digital text feature
- As a reminder of an important tip for using their device
- As a reference to check out later like a digital anchor chart
When might students annotate images on iPads?
- To demonstrate their understanding
- To point out a moment when they were confused
- As part of an exit slip to show a lingering question
- As a way to explain a concept to their peers
If you’re a regular reader of ClassTechTips.com you know how I love using technology tools to check for understanding. You can learn more about this concept of #FormativeTech here. If you’d like to see a list of annotation apps for iPads click here.
Share a moment when annotating an image came in handy in the comments below!